Guest Post by Heather Hohlowski
We built an aviary for pigeons!
Editor’s Note: When building an aviary for pigeons or doves, there are a few basic principles that are essential. The aviary must be built sturdy to protect against predators & rodents (no matter where you live). The entire enclosure- bottom, sides & top – must be .5″ or .25″ hardware cloth that is connected to ‘seal the envelope’ with no gaps more than .5″. Flooring, siding, roofing goes on over the mesh. Never use chicken wire as it is a death trap for the birds confined within it. Build it as big as you can. Half should be sheltered & half open for light & air. Locate it in a sunny spot (shade is easy to create) where you can see & enjoy the birds. Make sure all doors are racoon-proof. Please see How to Create an Aviary for additional information.
Building Our Aviary (Including materials, tools, costs, diagrams & a downloadable PDF)
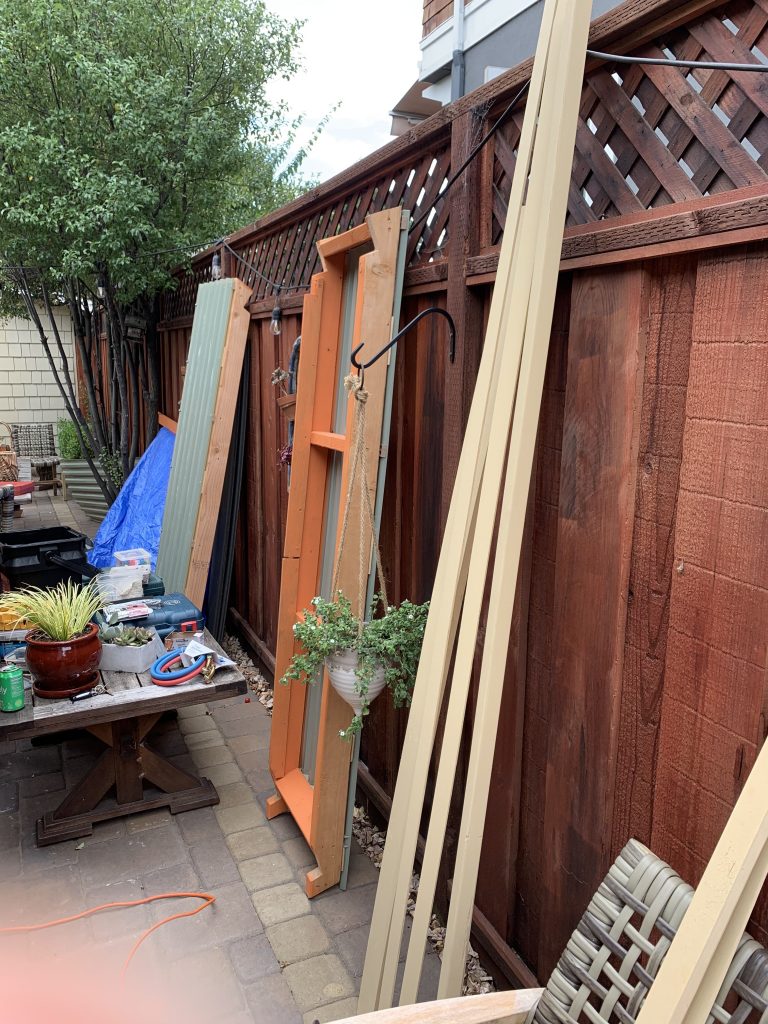
It Helps to Have a Friend Who Can Build Stuff… When we decided to foster two pigeons, we turned to our good friend — a GPS engineer by day and an amazing woodworker by night! We explained we wanted an aviary outside, but one that would be accessible via a bedroom window on the side of our house. There was a space below the window that we thought would be ideal — a small alcove with a couple of plants.
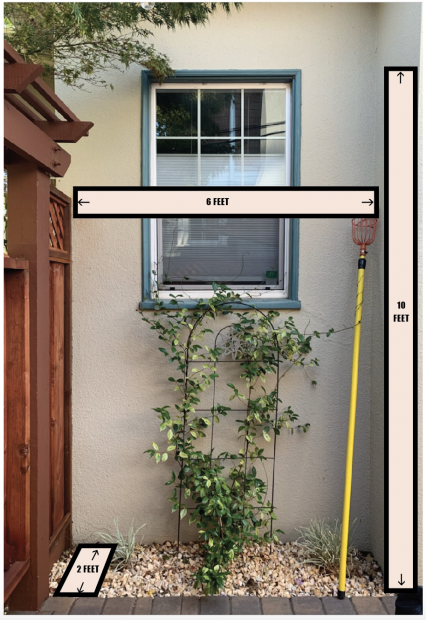
Picture 1- the alcove where the aviary will be
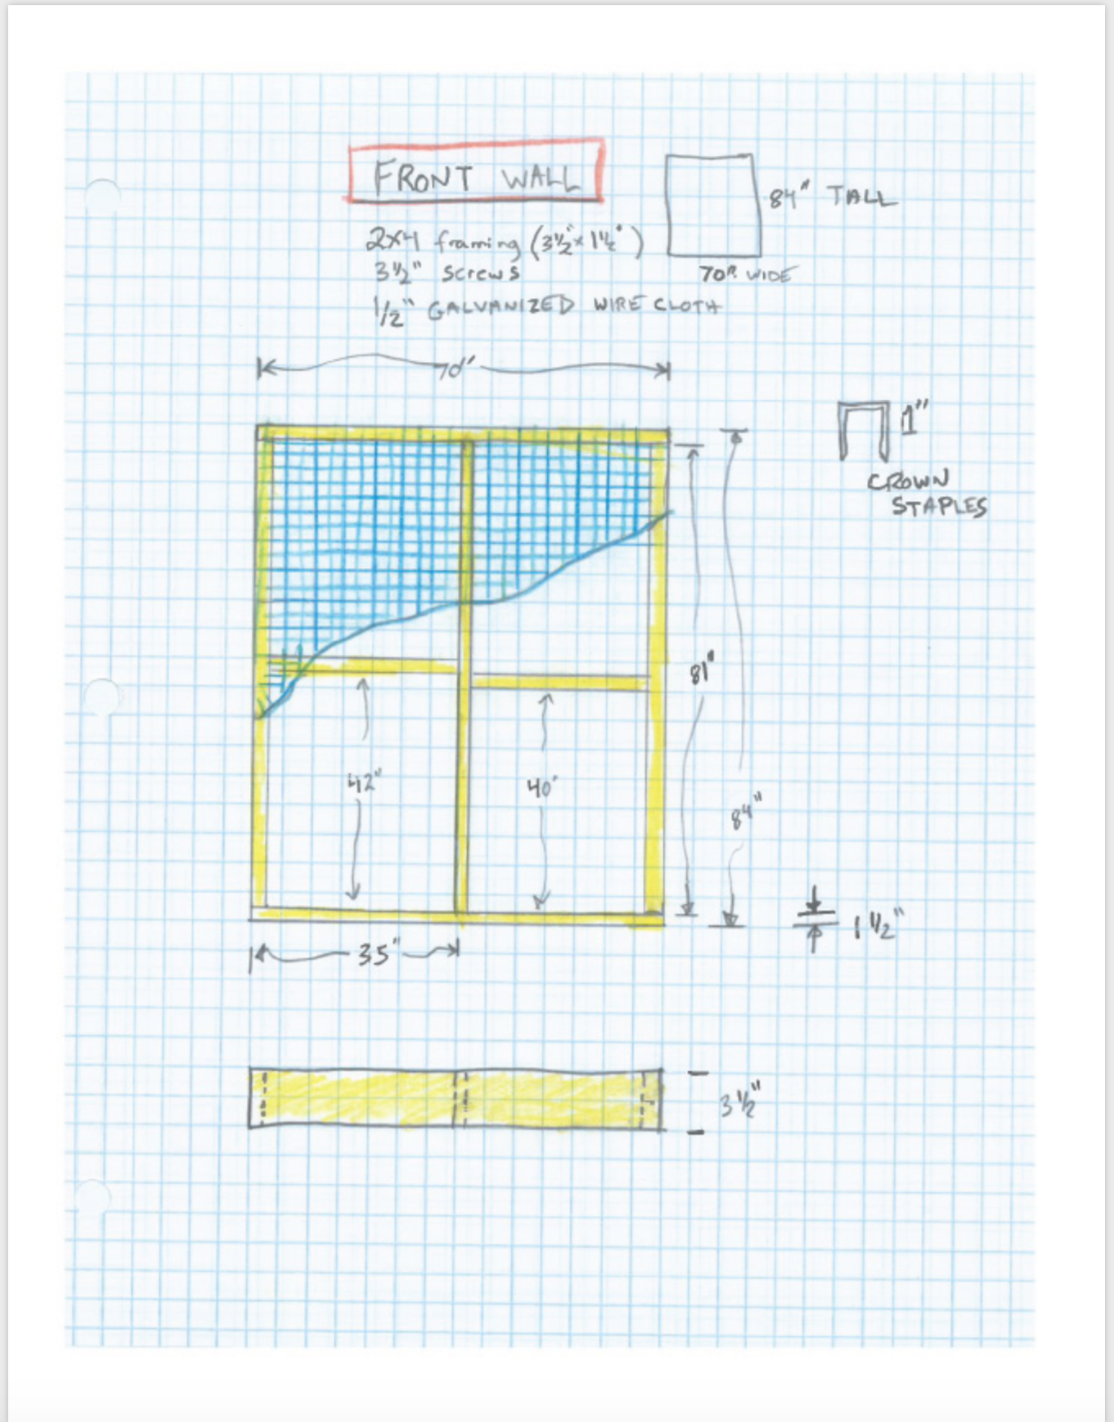
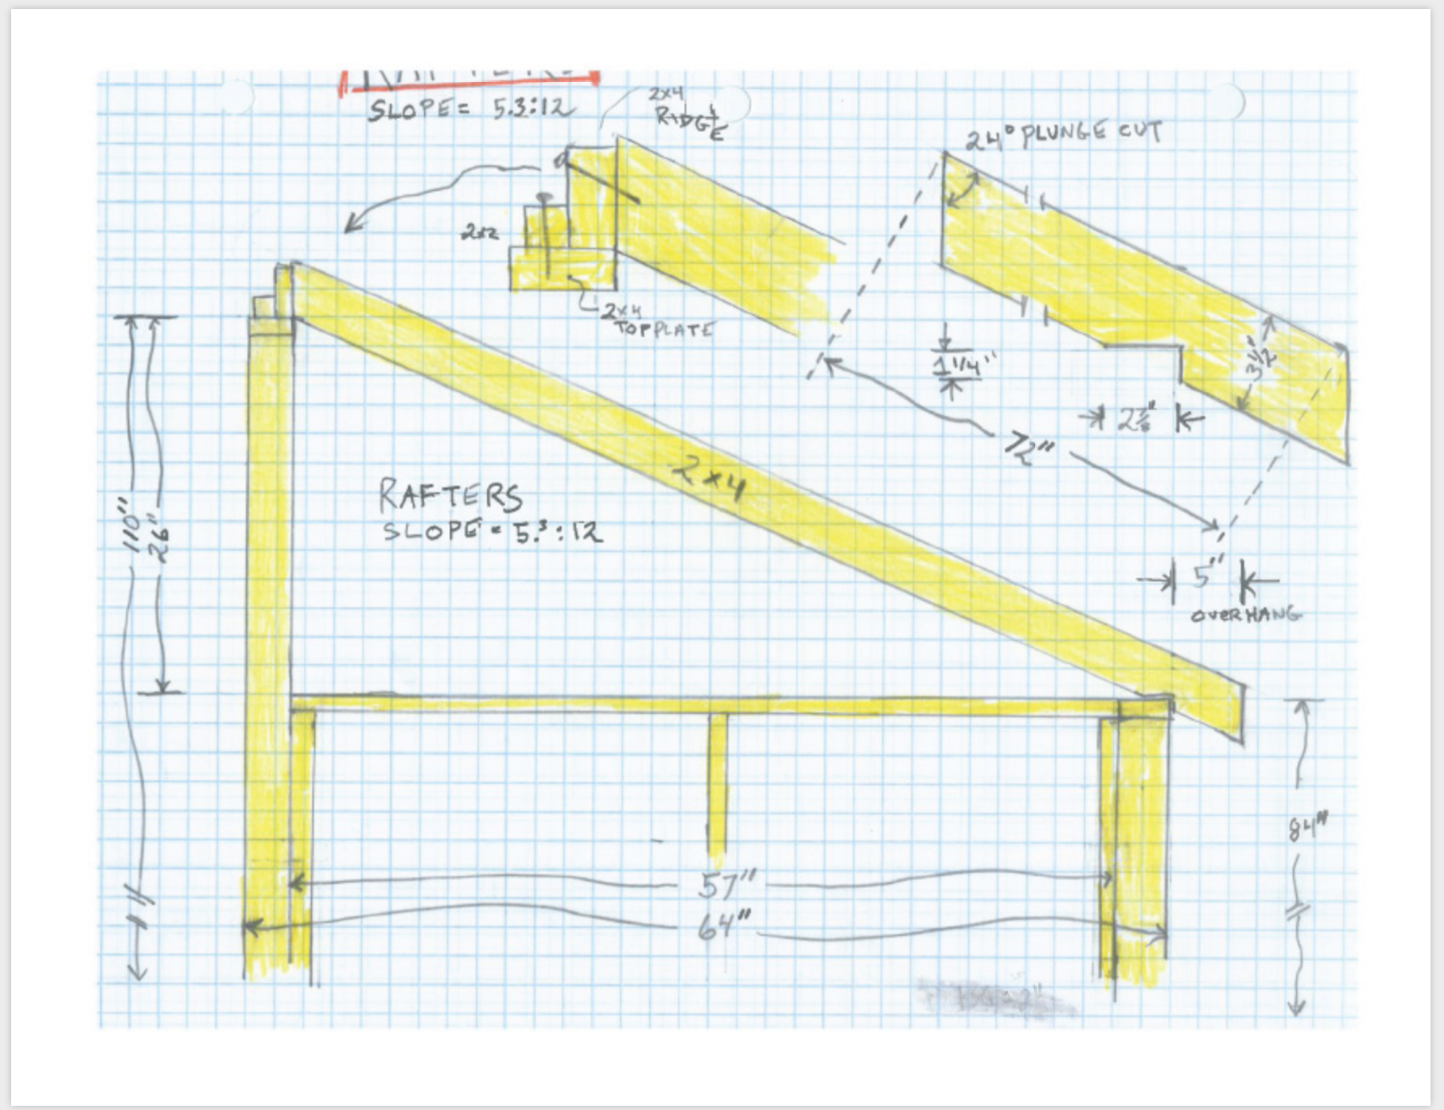
The height to the top of the window was 10 feet and the width between the fence and the alcove wall was six feet. We decided to have the aviary come out a few feet over the flower bed area and onto the driveway pavers, so the aviary depth would be six feet. The basic design would be 2-by-4 framing with a cut-out around the window and a small door on the side. The roof would slope down from the top of the window to the top of the fence line.
We removed the rocks and plants from the alcove, flattened out the dirt, then put some leftover pavers in the corners and along the back, level with the driveway pavers. The entire aviary would rest on top of that but would have it’s own base — essentially the aviary would be a self-contained unit that would occupy that space but that (in theory) could be pulled out of the nook if we ever wanted to move it to a different location in the yard.
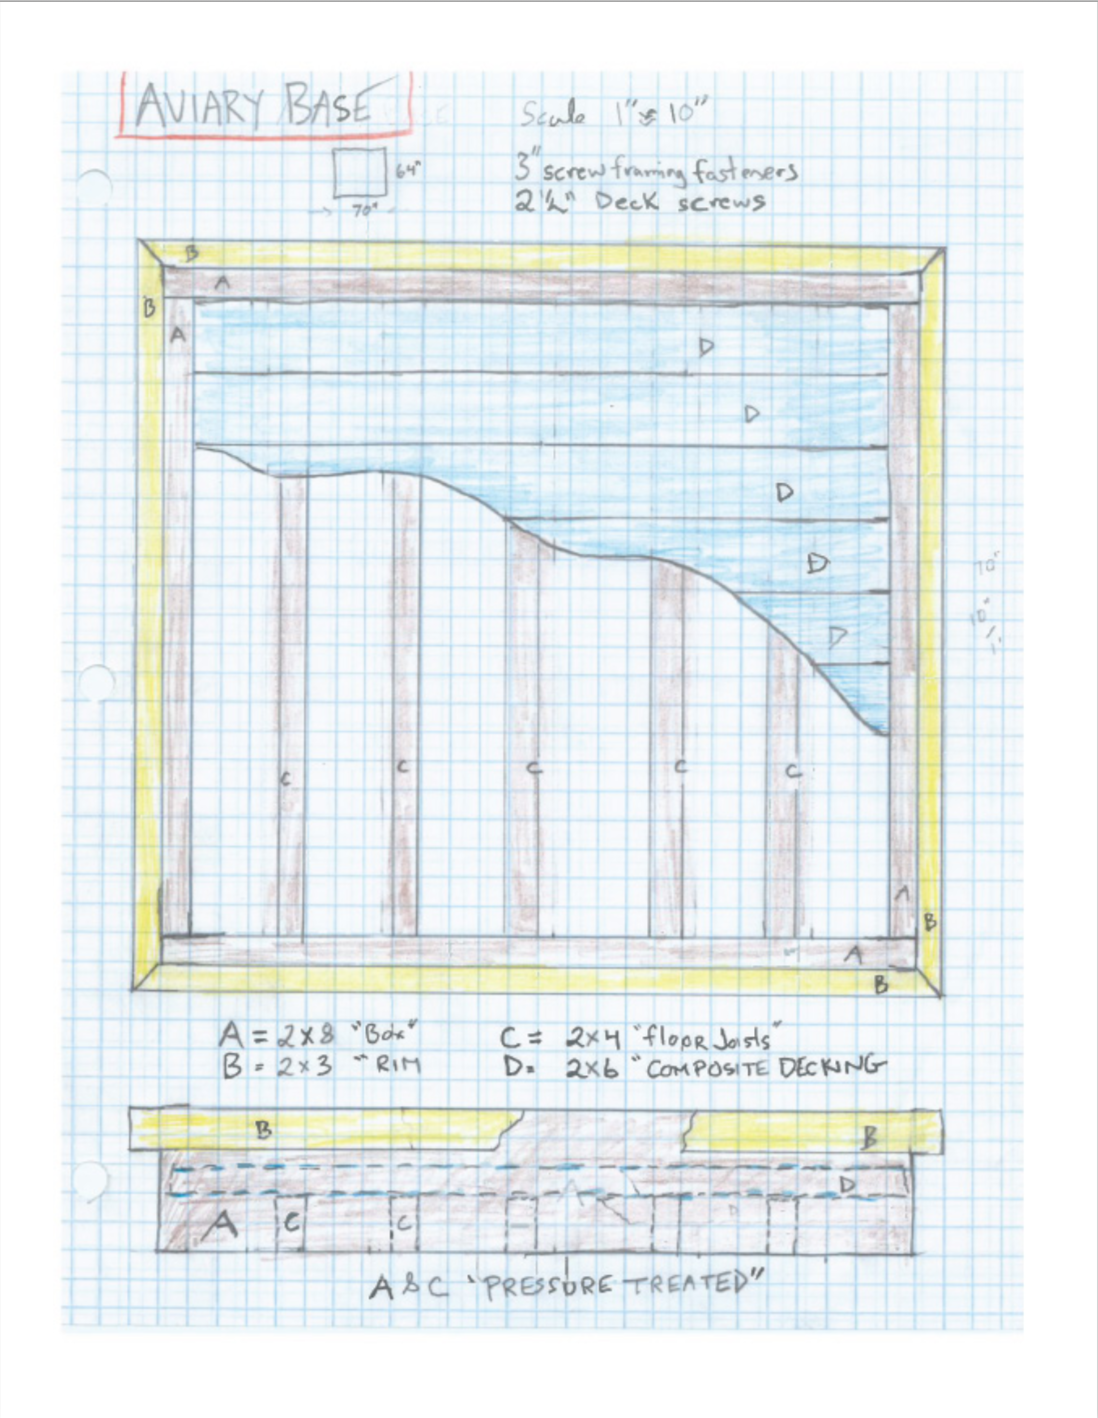
Our friend lives 30 miles south of us. So his idea was to build the aviary in pieces, i.e., make it pre-fab, and then drive the pieces up in his truck and put together on-site. The base was created using 2-by-4 framing, with composite decking (which is waterproof) screwed into the joists. (FYI, composite decking is heavy, so the frame was built and transported without the floor boards installed, and only when it was in place were the decking planks screwed in.) Picture 2 shows how we laid all the planks in just to check size and spacing. The darker colored wood is pressure-treated.

Picture 2- the aviary base/floor
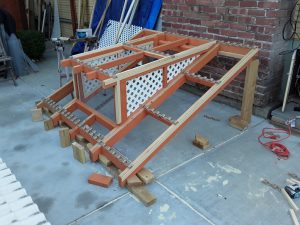
Picture 3 shows the four sides and base put together in our friend’s driveway. You can see the floor joists in the picture at right, which is what the composite decking planks were eventually screwed into. The joists, like the rest of the base frame, were pressure-treated 2-by-4s. He marked each wall with L (left), R (right), F (front), B (back) so we could easily put them in the correct spots once everything arrived at our house. He also made line markings (see Picture 4) on the base and each wall to use lining the walls up when in place.
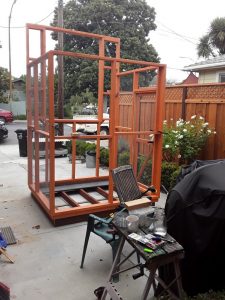
Picture 3 shows the four sides and base put together in our friend’s driveway
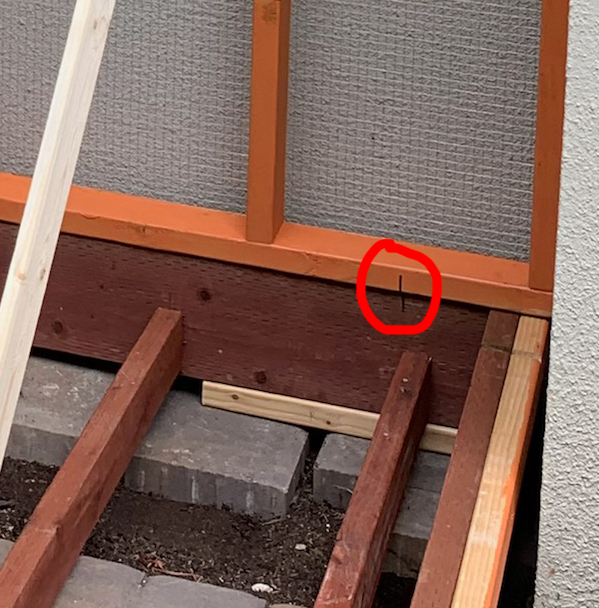
Picture 4 – line markings on the base and wall line up when in place
Once all the pieces arrived, we slid the base into place in the alcove so that it rested on the driveway pavers and the spare pavers and shims we put on top of the alcove dirt.
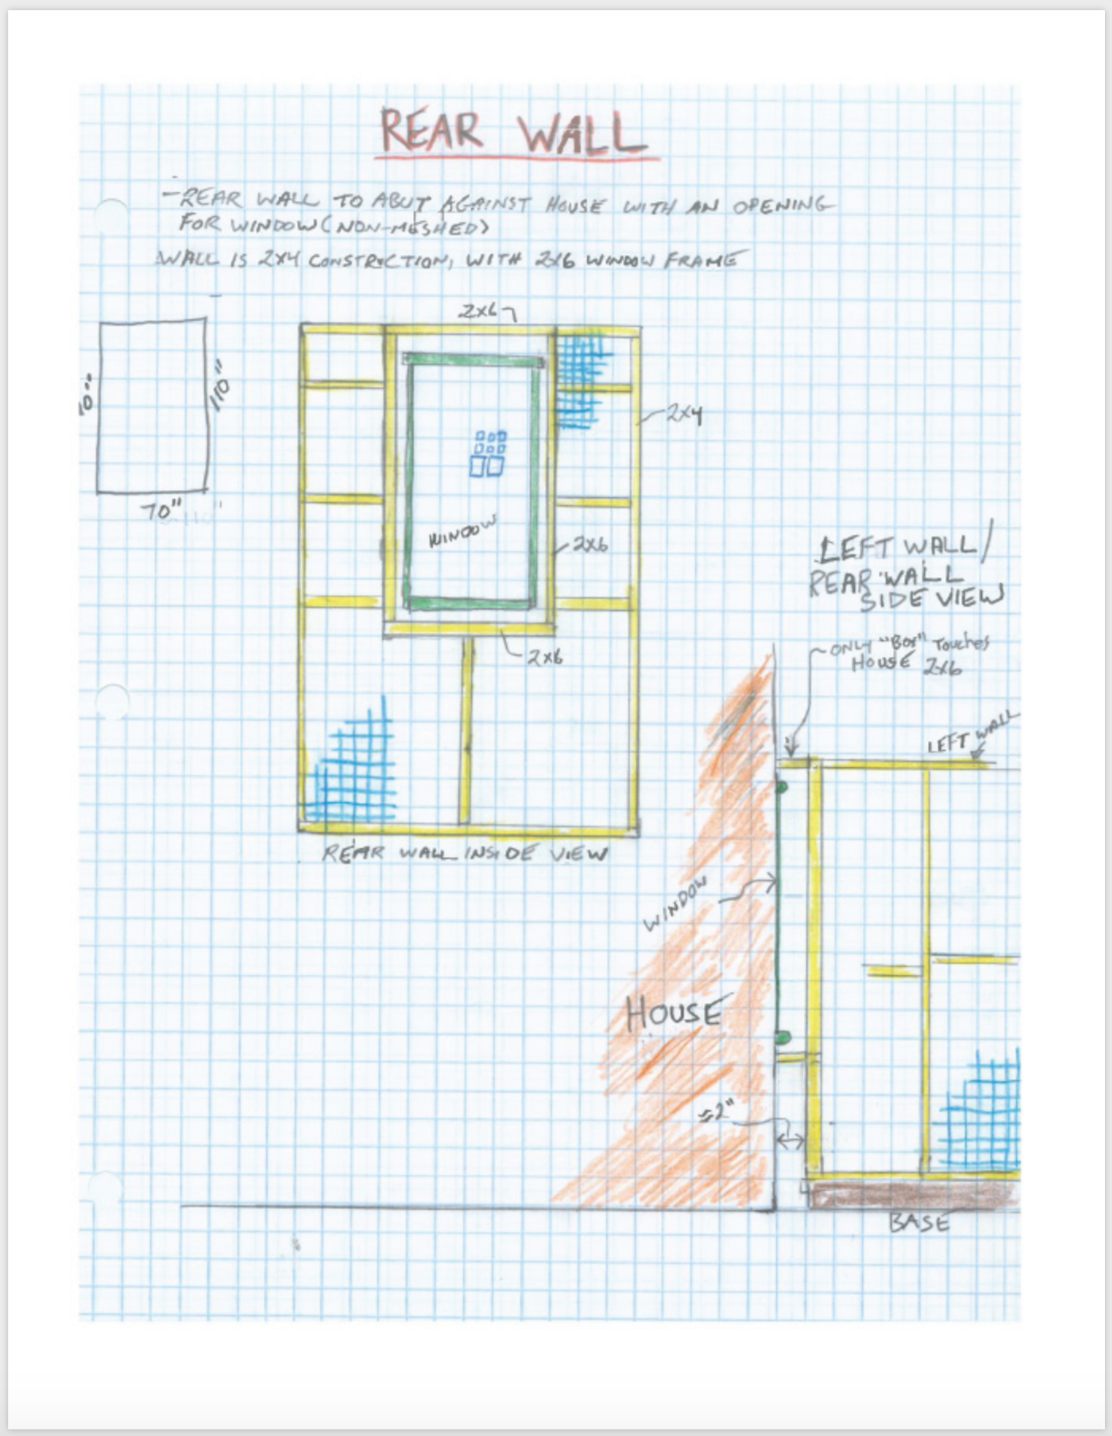
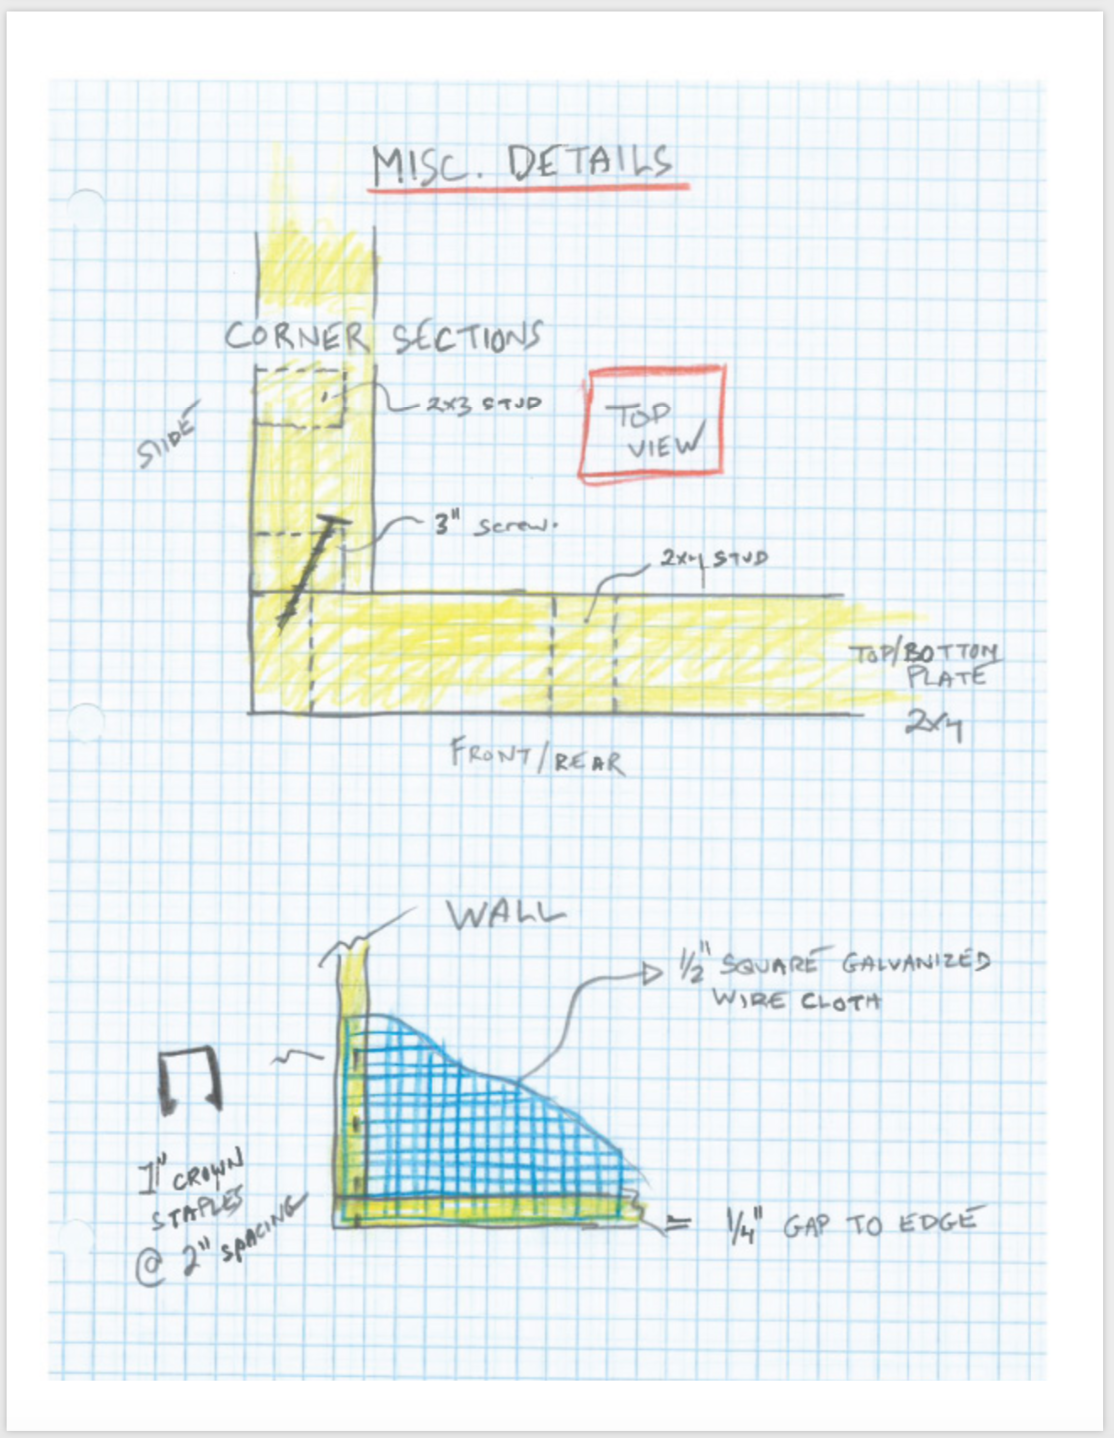
Using the lines drawn on base and walls, we lined up back wall into place and used some spare wood to hold the back wall in place while we used a level to make sure everything was straight before screwing the back wall down onto the base. You can see in Picture 5 that the back wall includes a vertical piece of wood (about 2” by 2” x 12”) on either outside 2-by-4, which the sides can butt up against and be screwed into. (See Picture 6 with blue circles around the wood pieces.)
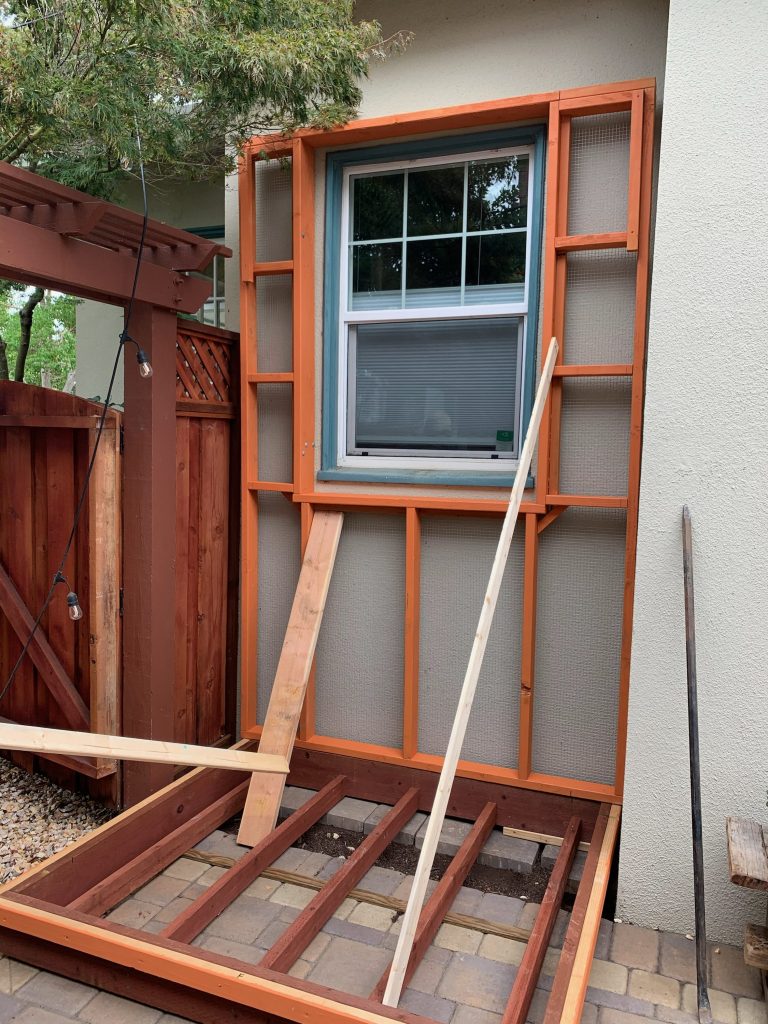
Picture 5 – the back wall includes a vertical piece of wood (about 2” by 2” x 12”) on either outside 2-by-4, which the sides can butt up against and be screwed into

Picture 6 – circles around the wood pieces
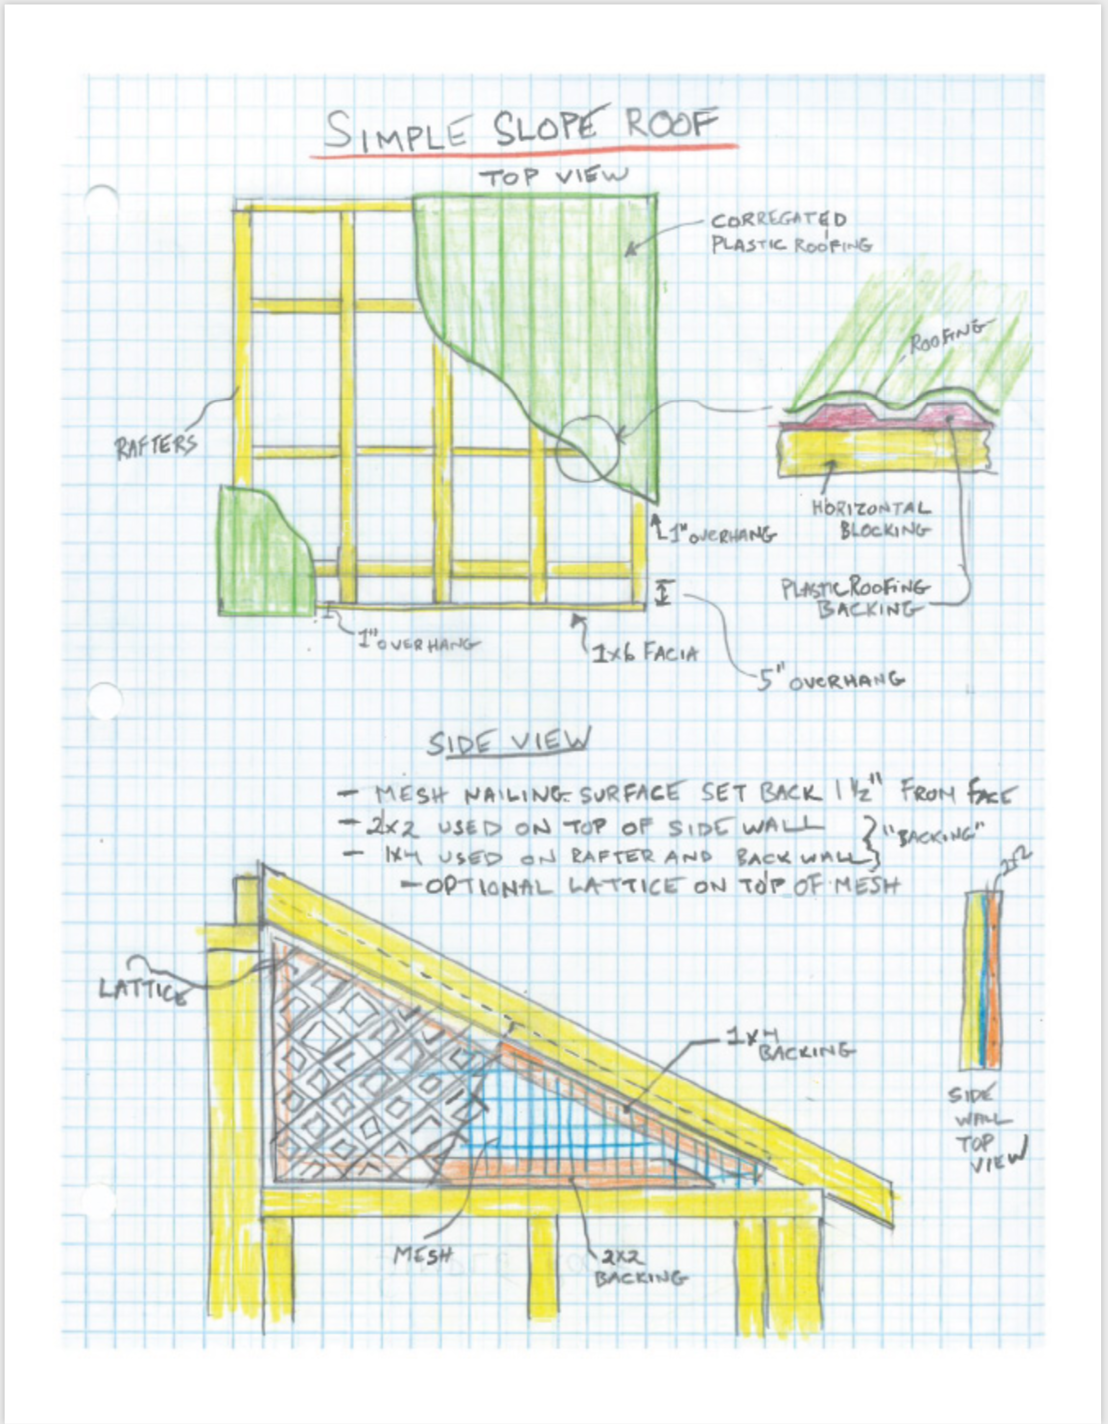
Once each wall was in place, it was time to put the roof on. The roof was transported in three pieces (left, middle, right). Picture 7 shows the left and right sections of the roof are shown leaning against the fence. Picture 8 shows the wavy plastic horizontal pieces which hold the corrugated roof in place.
Picture 7 – sections of the roof leaning against the fence
Picture 8 – showing the wavy plastic strips which secure the corrugated roof
The middle “dormer” section was added as a way to allow light into the bedroom window instead of having the roofing slant down all the way across. It can easily be left out to cut down on costs. (Note- the entire enclosure- everything- is lined with .5″ hardware cloth to keep rodents & predators out.)
Picture 9 shows us putting the left roof section in place. At right, the middle section is screwed into place. Making the roof entirely of corrugated roofing material is also an option and less expensive than the version shown here.
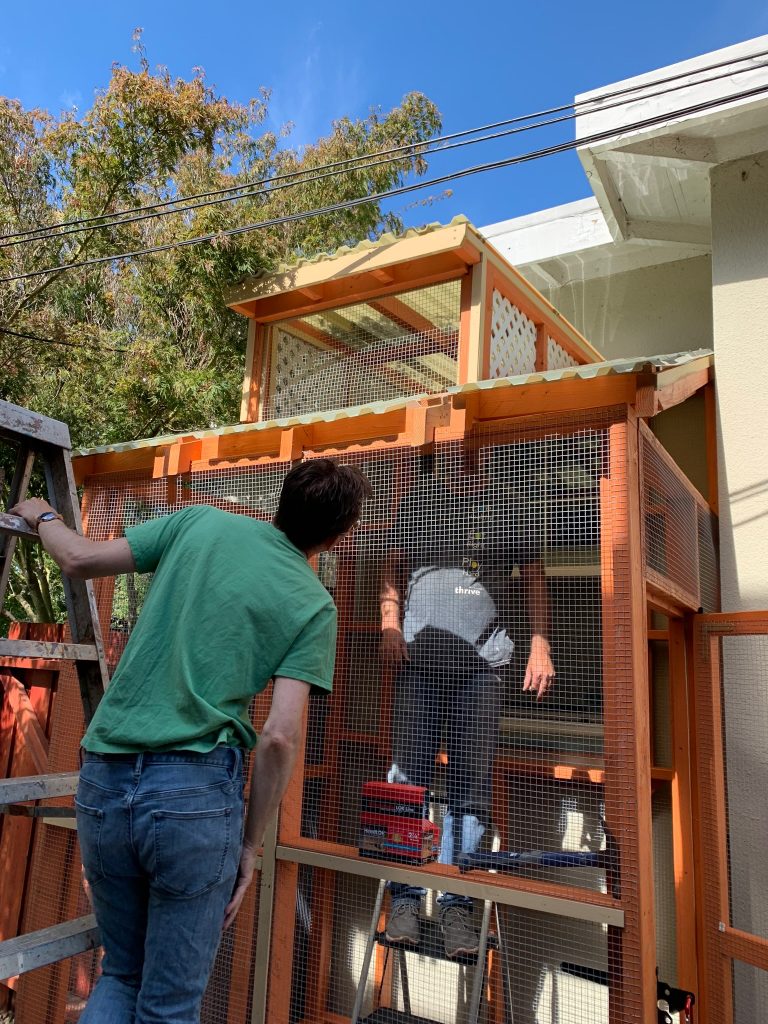
Picture 9 – putting the roof in
On the top of the dormer window, you can see fascia board, made of pine. This is a decorative touch that serves to cover the ends of the joists.
Each section of the roof was notched (see Picture 10) so that it could rest easily on the top of the front and back wall 2-by-4s. These notches are known as “bird mouths” believe it or not!
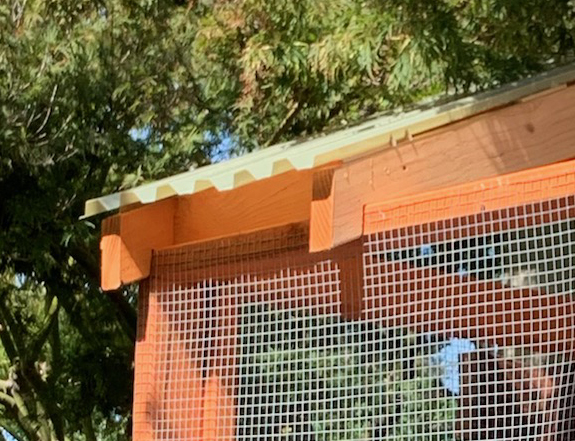
Picture 10 – roof beams notched so that it rests easily on the top of the front and back wall
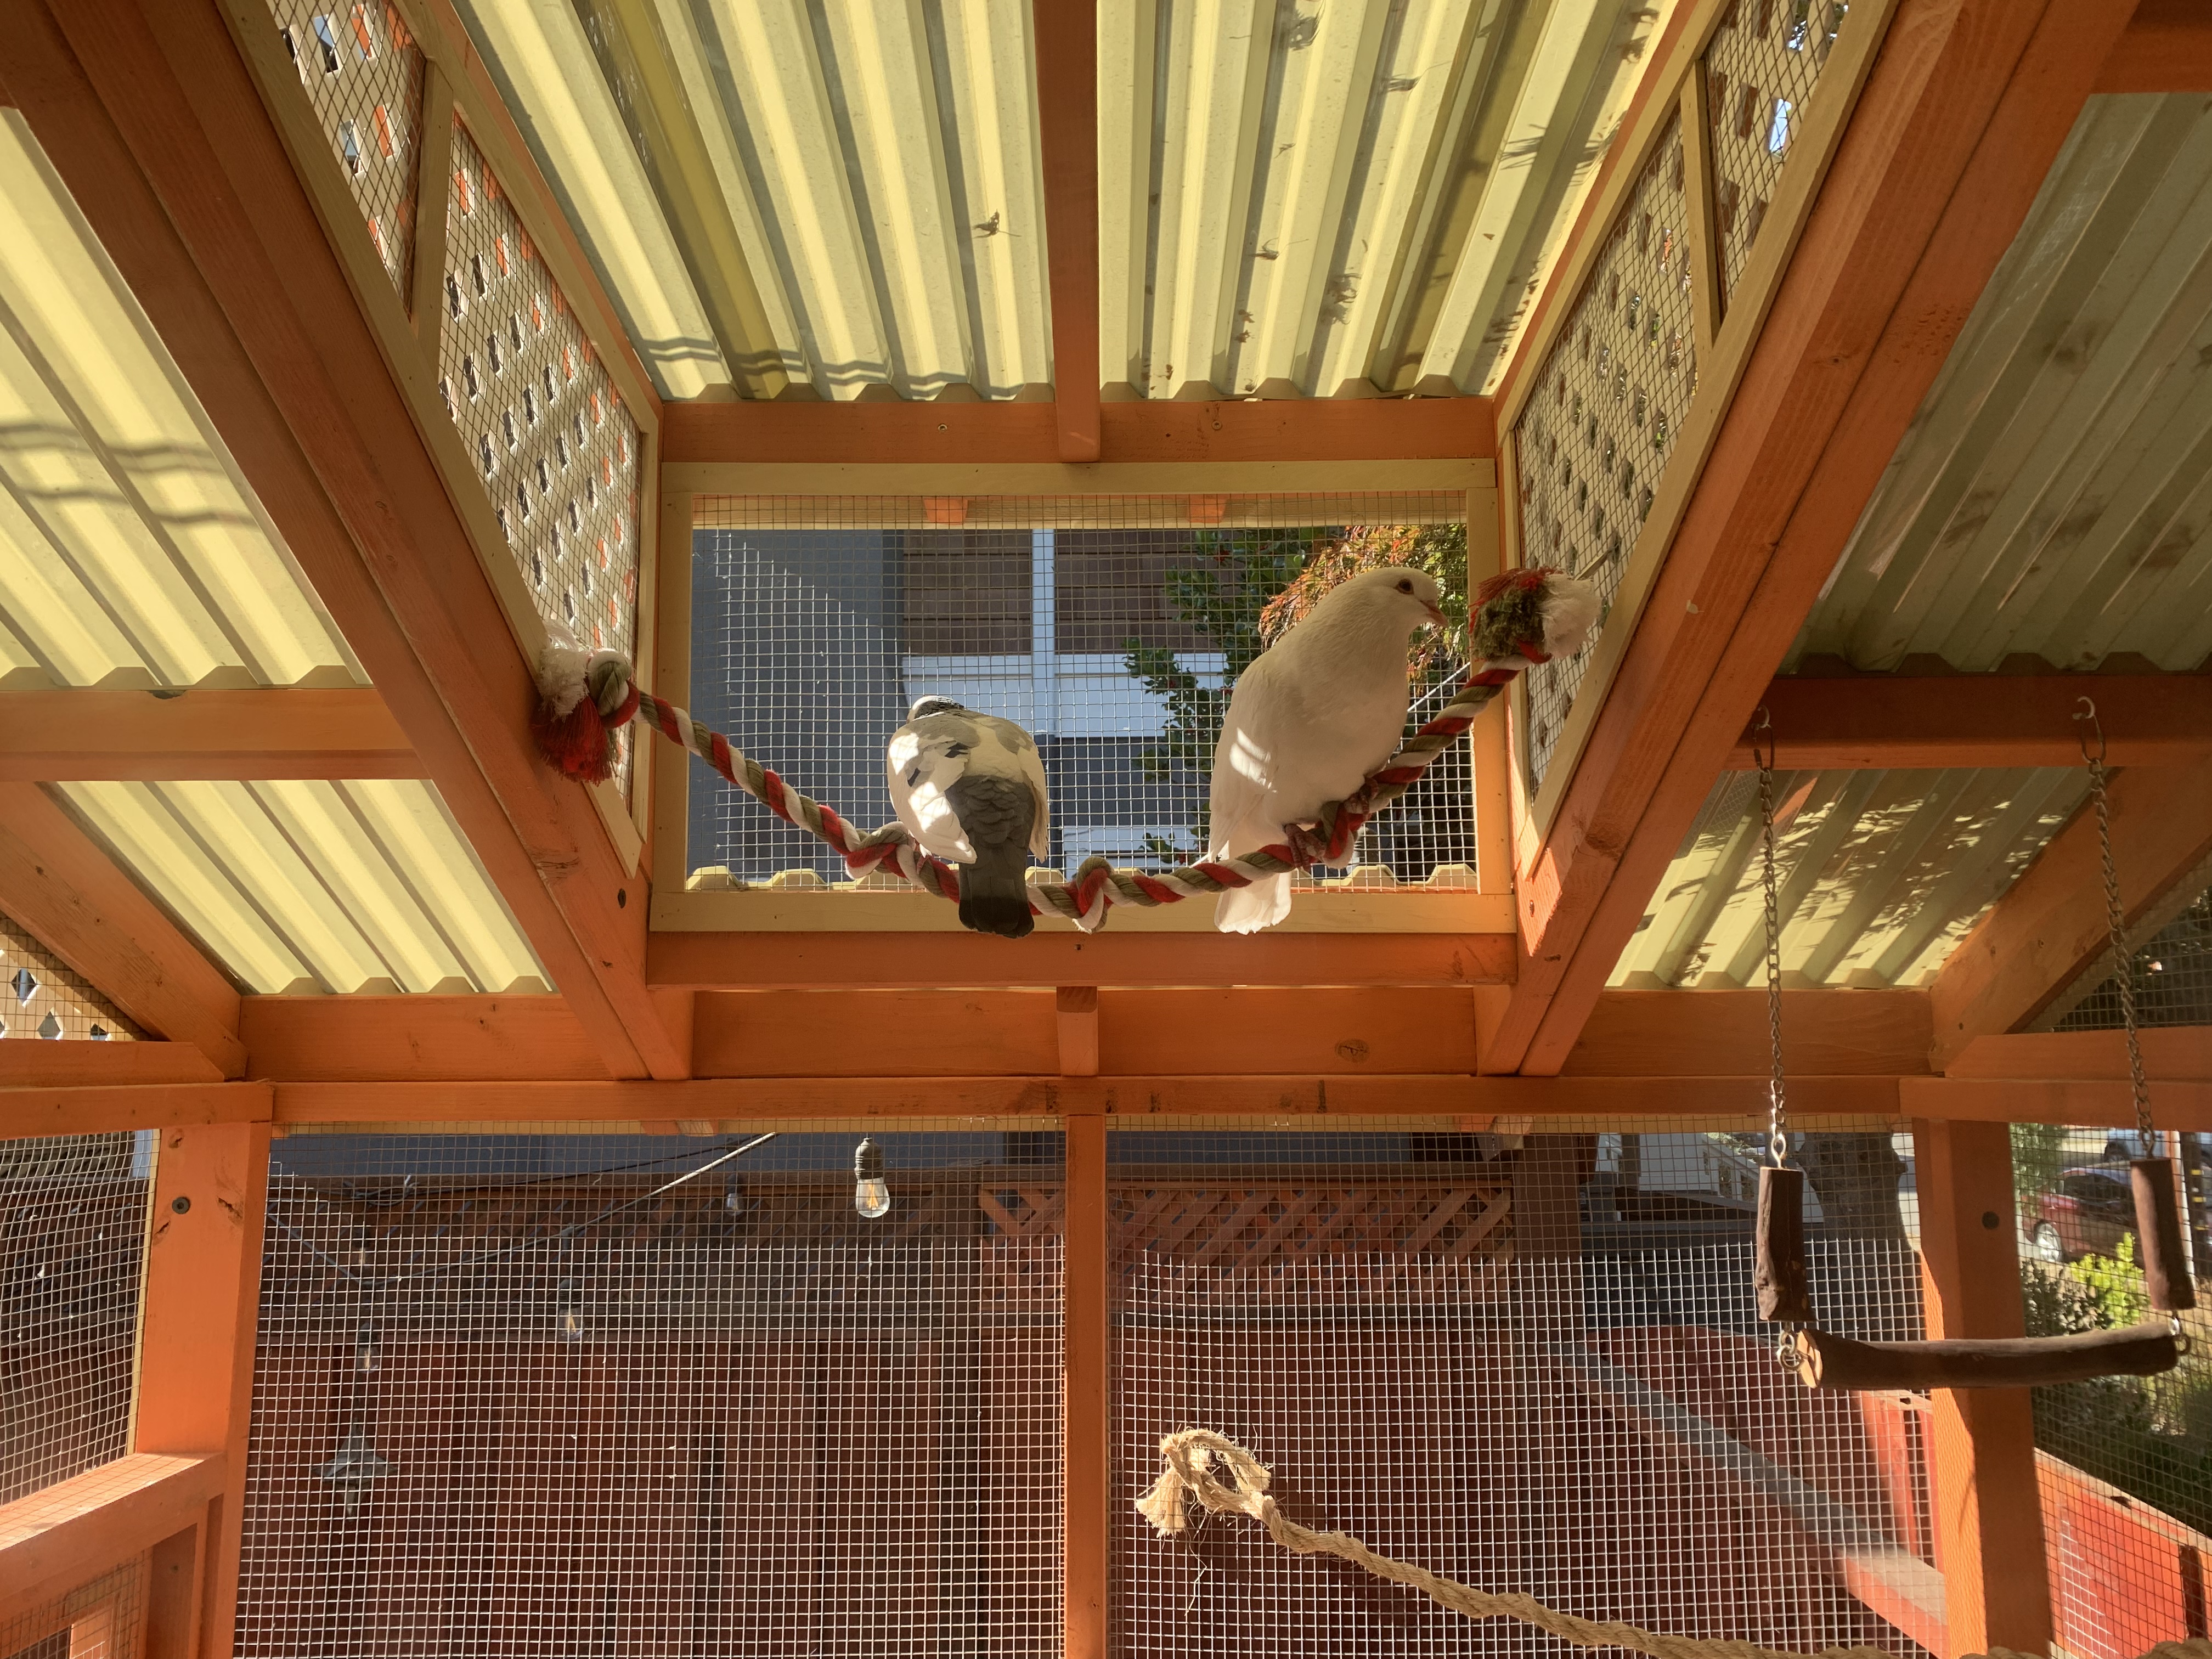
Picture 11 looks up at the middle section of the “dormer” roof. As mentioned, this touch meant that the sloped roof did not completely block the view from inside the bedroom looking out. It also created a nice space for a rope perch the pigeons can hang out on! Trim was added on top of the edges of the wire mesh for a decorative touch and to avoid sharp edges that might catch a wing in flight!
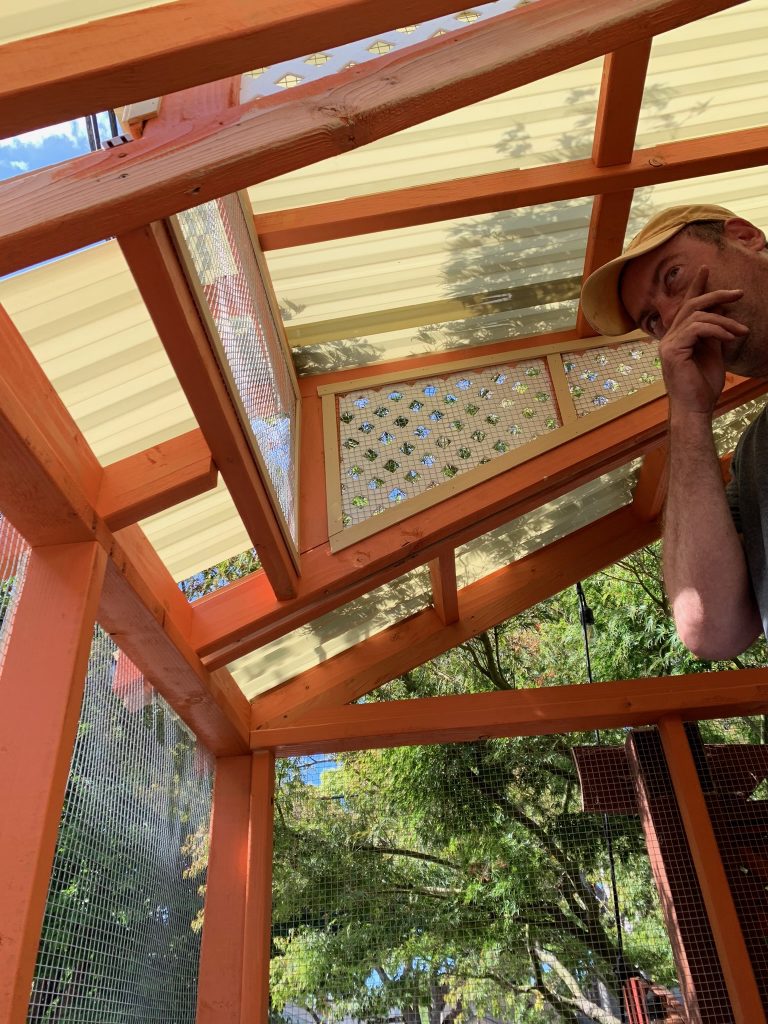
Picture 11 – the middle section of the “dormer” roof
Picture 12 shows the view from inside looking out! We used two quarts of paint to paint the wood, but this isn’t a must-have. Kelly Moore in San Jose offers “sample” quarts most colors for $8.50. (We used “Pumpkin Pie”.) We special ordered “Misty Green” for the corrugated roofing (which added a week to the project), but Home Depot offers clear, white, and dark green in stock. The roofing is attached by first screwing plastic closure strips to the roof joists and then screwing the corrugated plastic onto those strips. See materials list for more info.
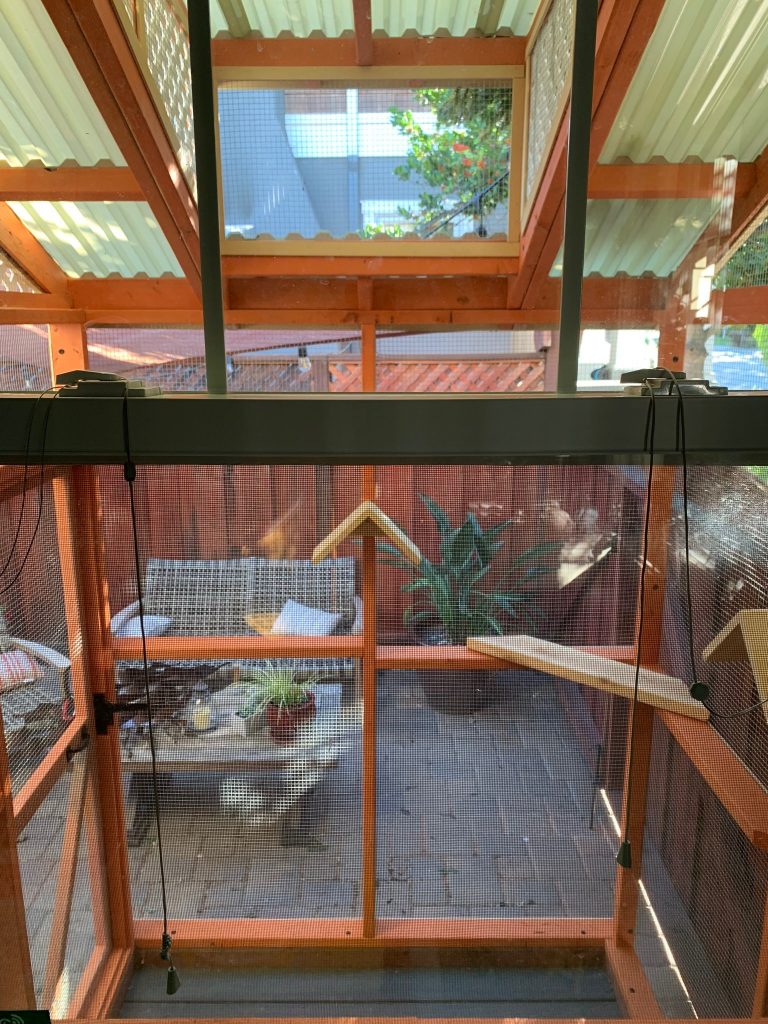
Picture 12 shows the birds’ eye view
Pictures 13 and 14 show a nice perch spot just above the door, although obvious care needs to be taken when opening door. You can also cut squares out of pine and screw them down onto these 2-by-4s to add extra depth to these types of perch areas.
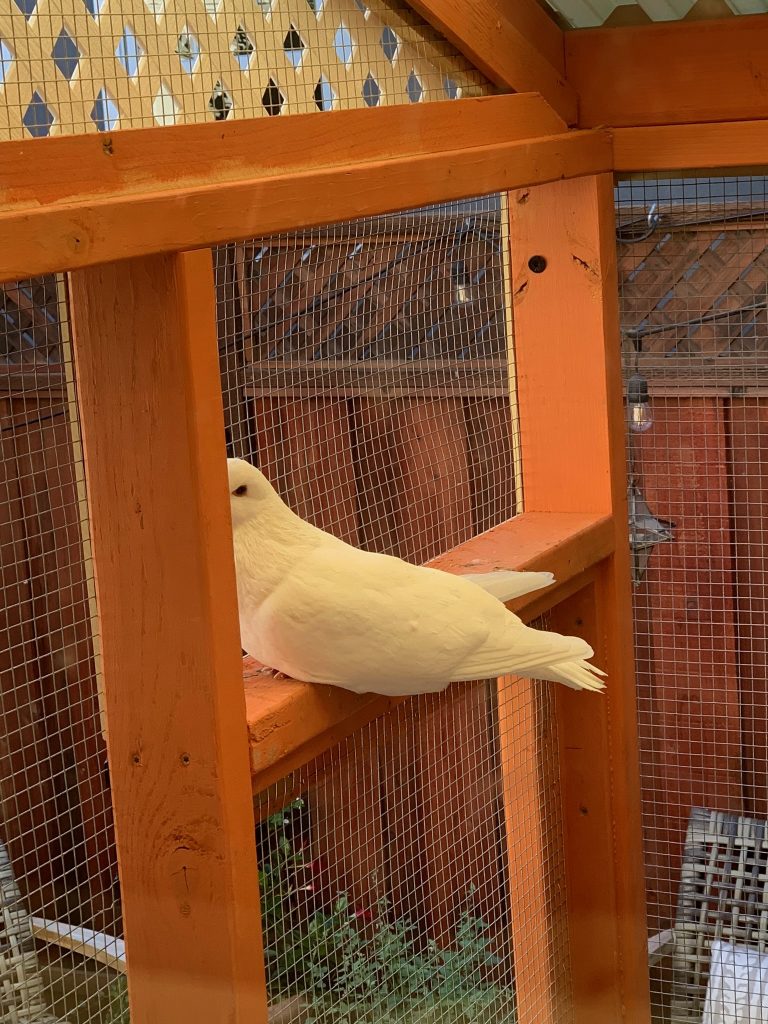
Picture 13 frame = perch
Picture 14 – perched
We put up strips of trim to hide the edges of the wire mesh. The mesh was attached with a staple gun and staples were placed every two inches to ensure security against rodents and predators.
Picture 15 shows the back right corner showing where two sides meet. The extra horizontal 2-by-4s add strength as well as ready-made perching spots.
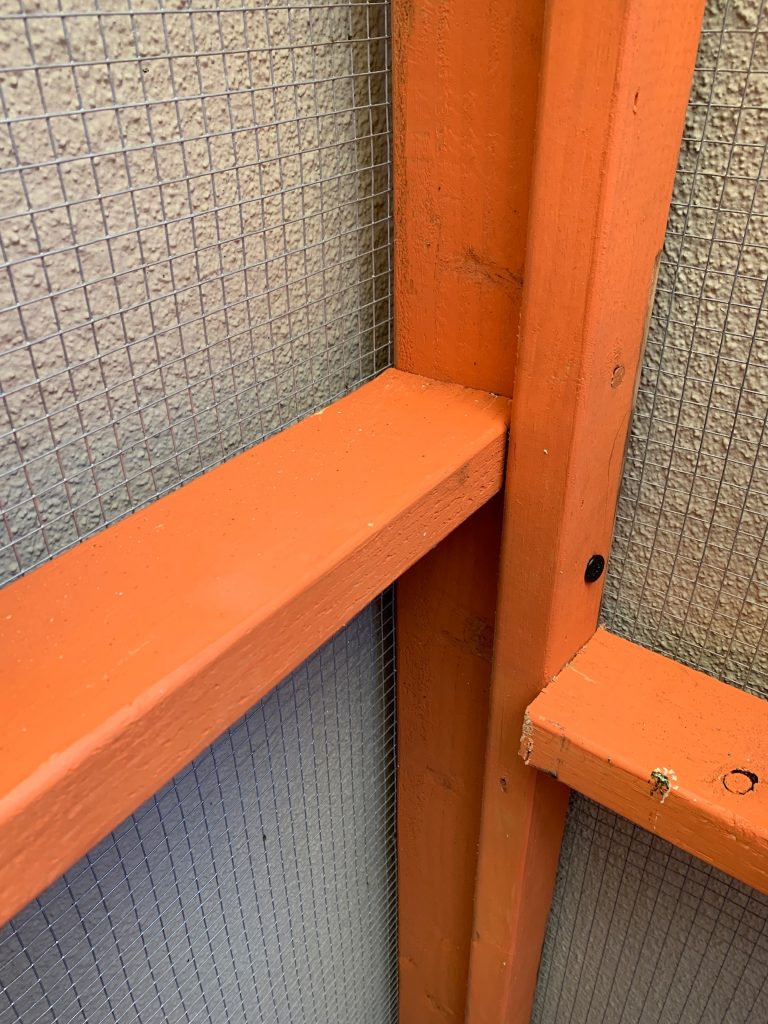
Picture 15 – back right corner showing where two sides meet
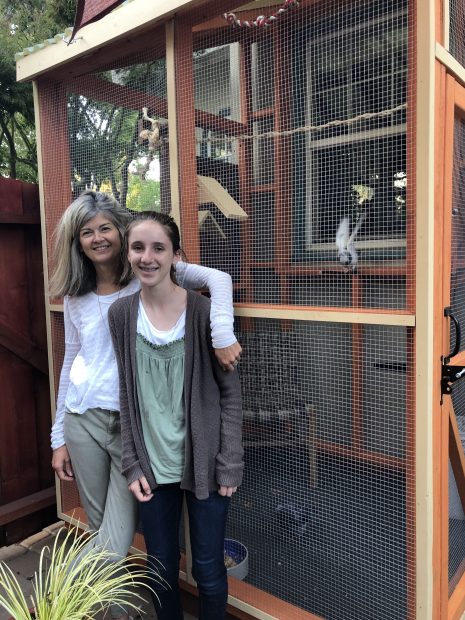
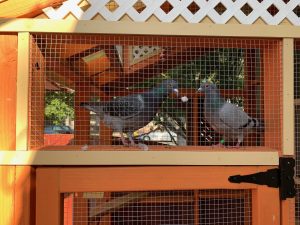
Photos 16 and 17 show the finished aviary!
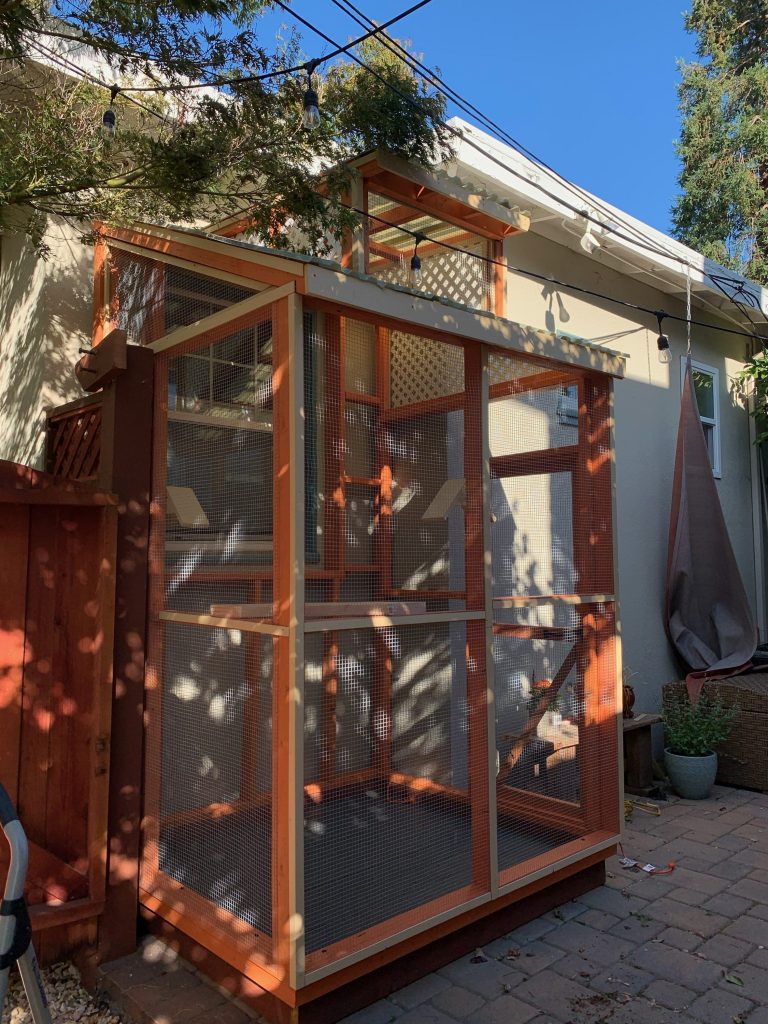
Picture 16 – our aviary custom built to fit a window alcove
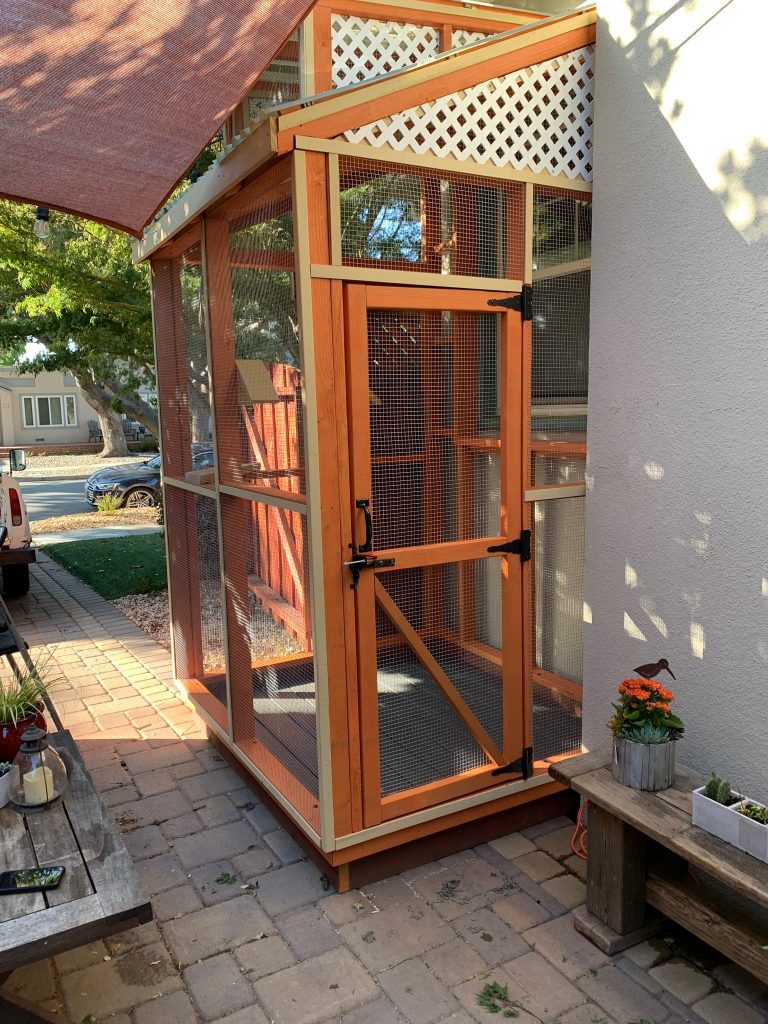
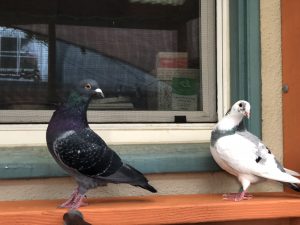
Picture 17 – ready for pigeons!
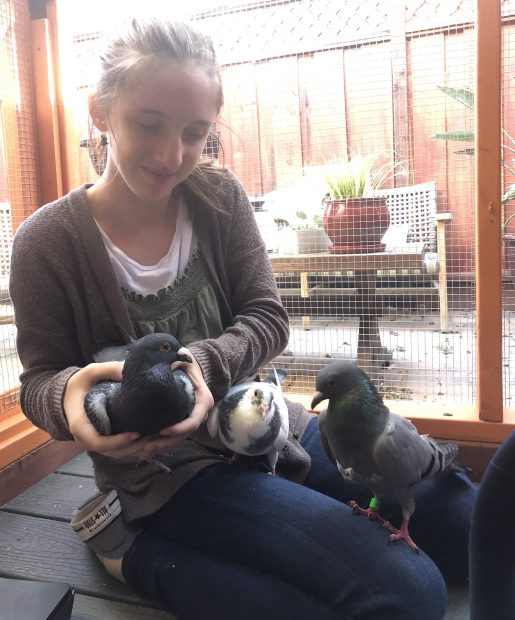
Kyla welcoming Boris, Page & Bugsy
Boris & Page explore
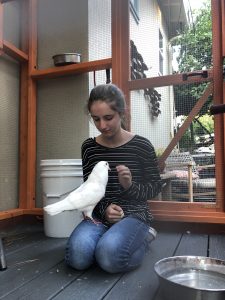
Kyla & Cantaloupe
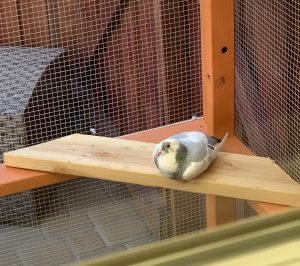
Page relaxing
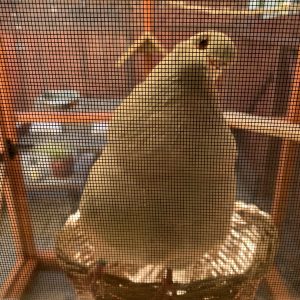
Cantaloupe says, Come out & visit with us!
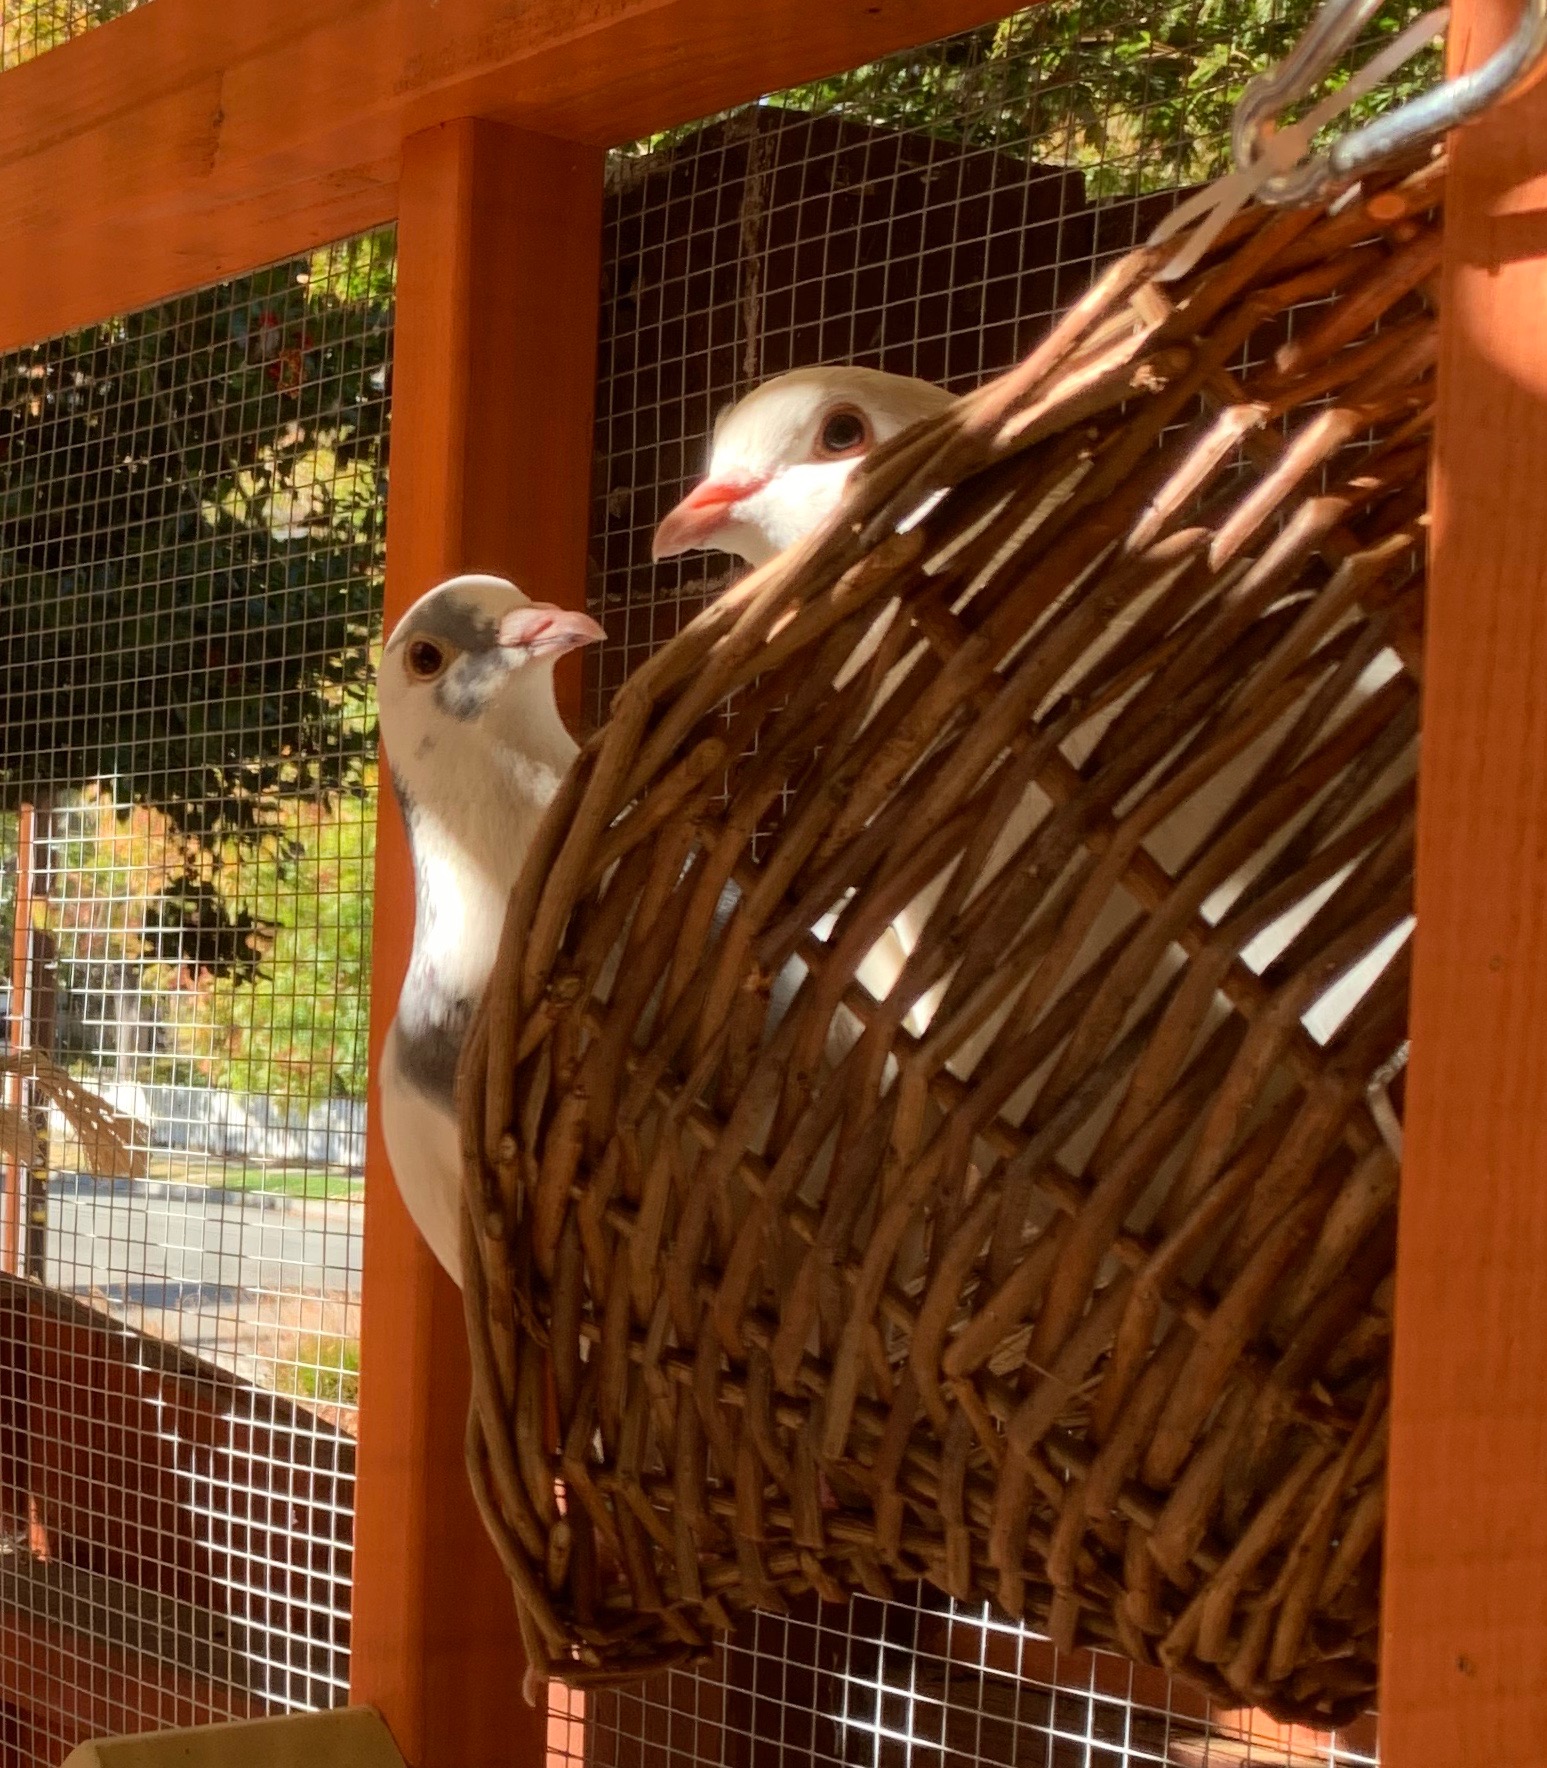
Page & Cantaloupe in their nest
Penthouse perch
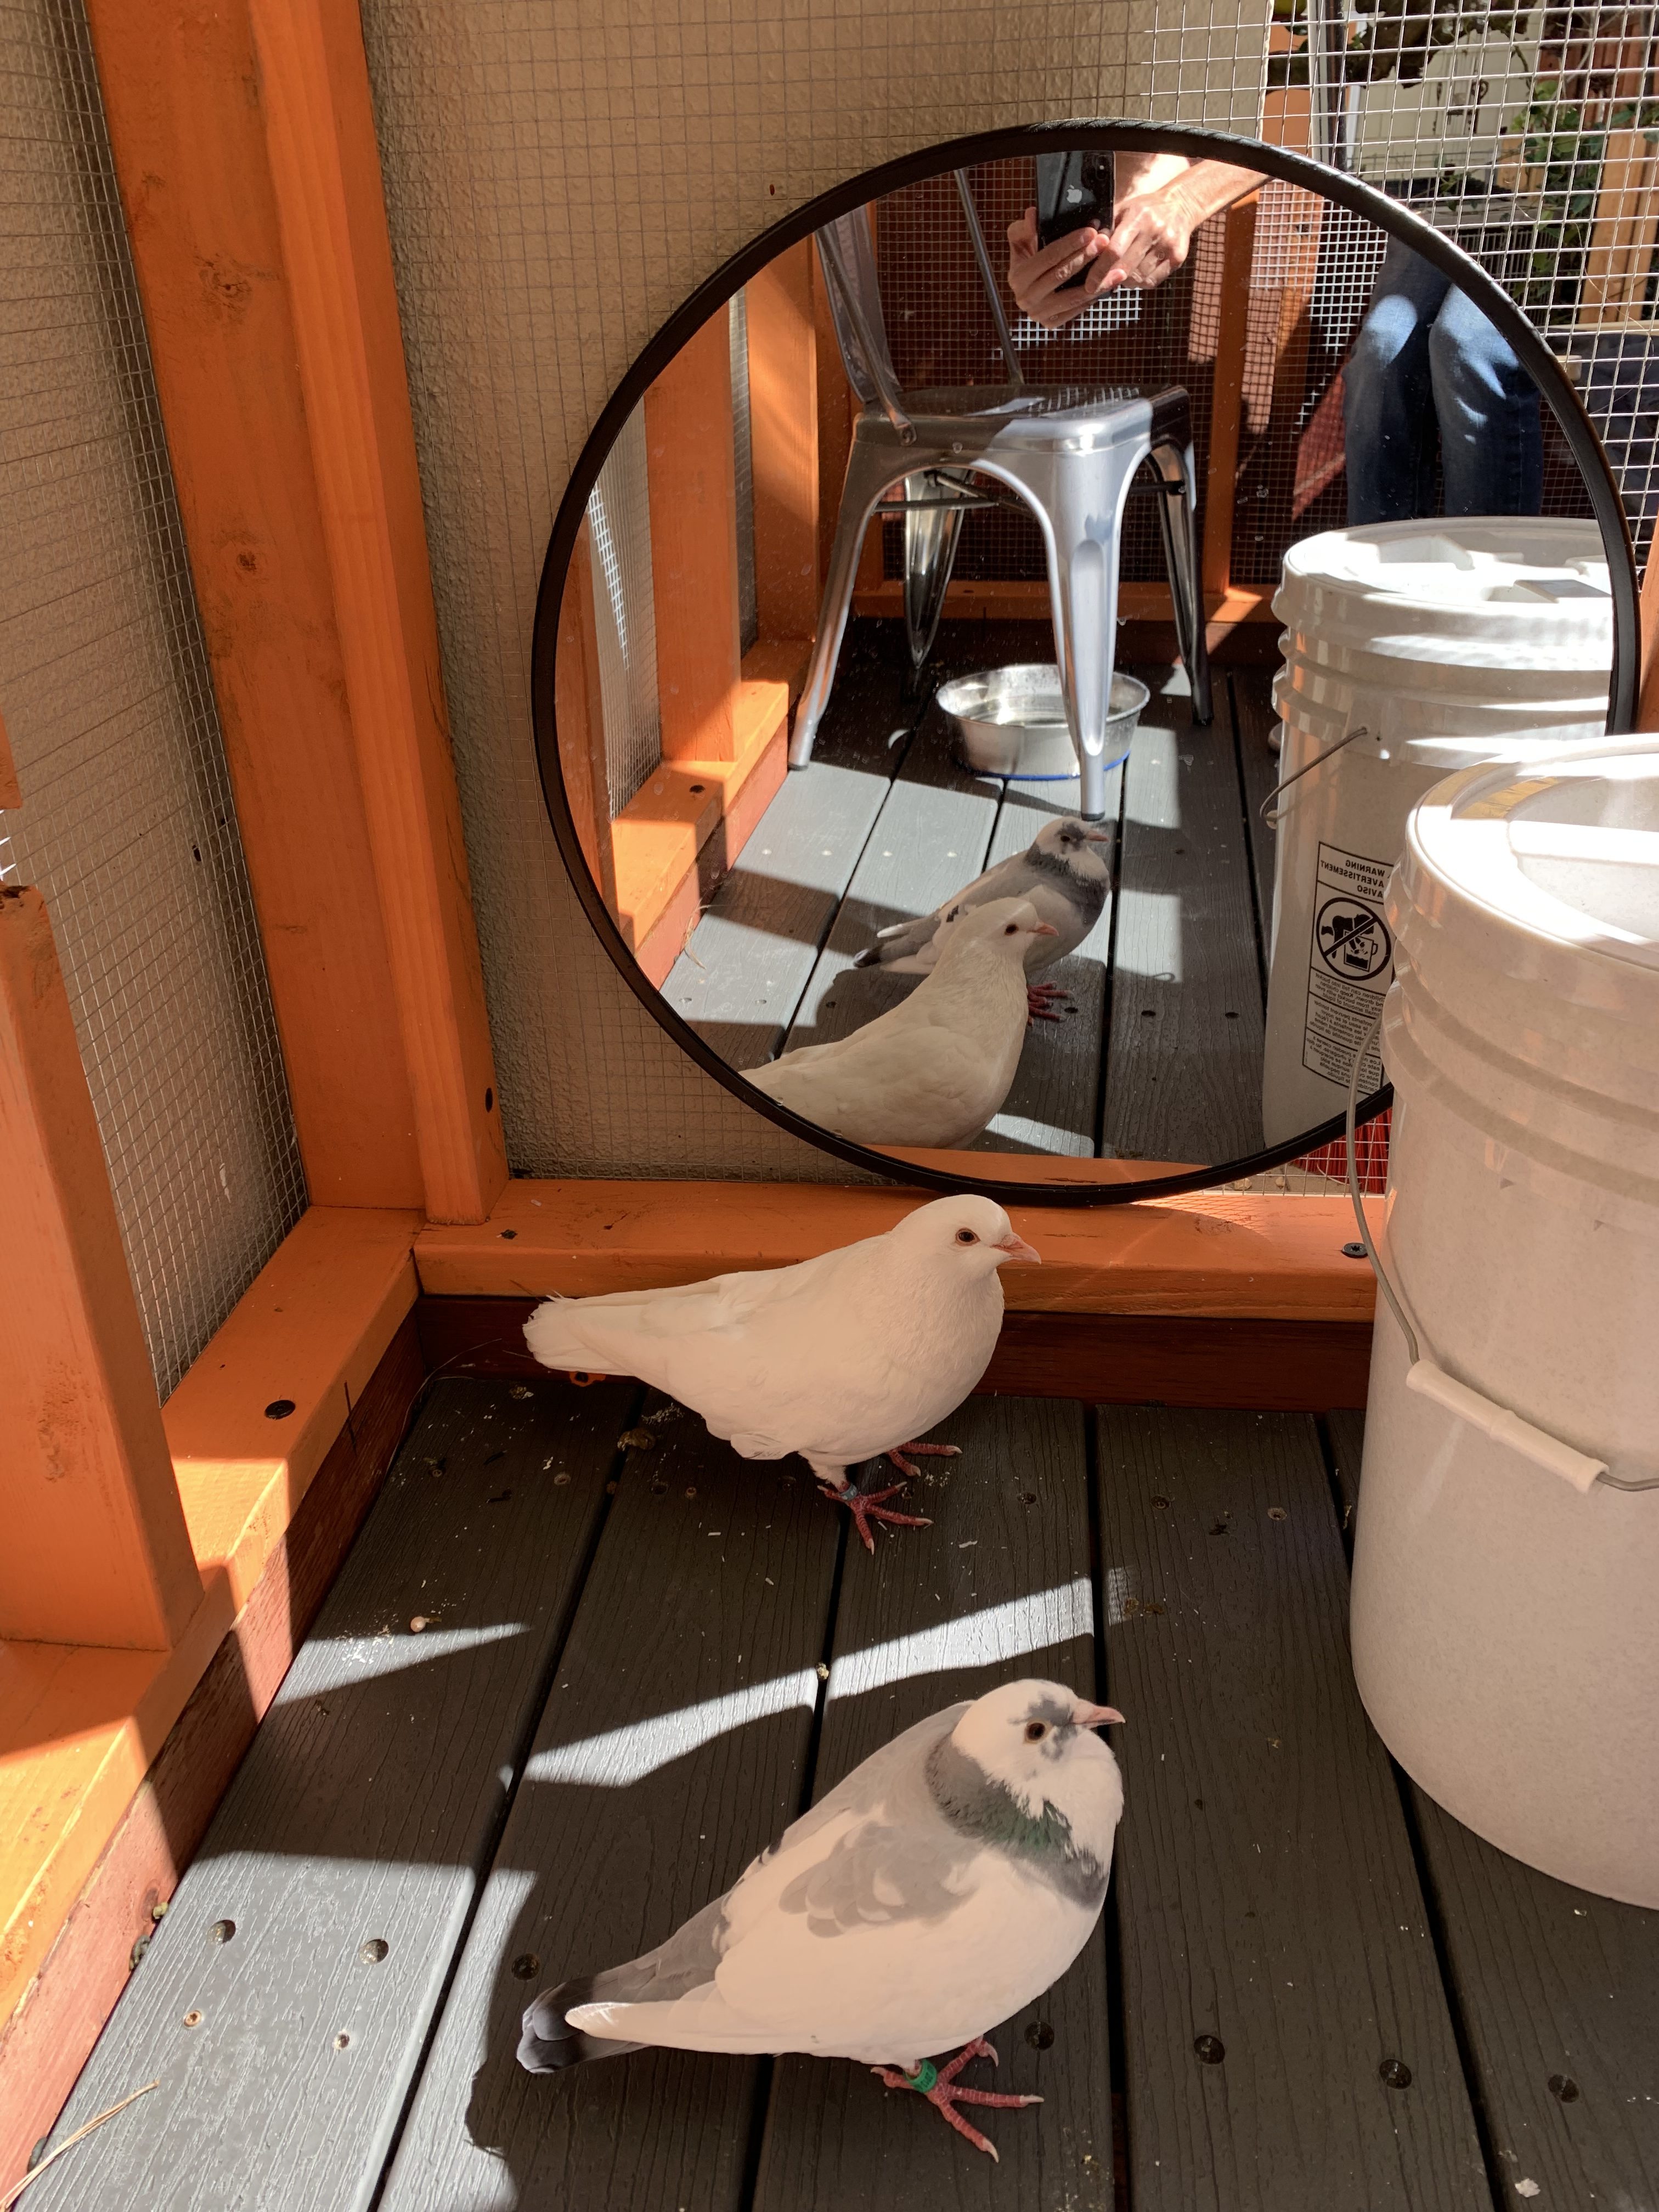
Pigeons love having a nice big mirror
Materials
| WOOD | ||
| 2 in. x 6 in. x 8 ft. #2 and Better Prime Douglas Fir Lumber | $3.95 ea | Framing around window in back wall. Used 2 x 6 here instead of 2 x 4 because we wanted framing around window to stick out further than the rest of back wall. |
| 2 x 4 x 10-ft Douglas Fir Stud | $4.66 ea | Two needed for back wall. |
| 2 x 4 x 8-ft Douglas Fir Stud | $2.38 ea | Main structures for walls and roof. Approx 16 needed. |
| 2 in. x 2 in. x 96 in. Furring Strip Boards | $2.28 ea | Nailing/backing surface for mesh in roof sides., and some roof construction. Appox 4 needed. |
| 1 in. x 2 in. x 8 ft. Furring Strip Board | $1.14 ea | Misc. Roof construction. Approx 3 needed. |
| 2 in. x 3 in. x 8 ft. Select Kiln Dried Whitewood Stud | $1.98 ea | Side wall studs and cross members and door frame. Front/back were 2 x 4; sides were 2 x 3. Also upper edge of base trim. Approx 14 needed. |
| Pressure treated 2-in x 4-in x 10-ft | $6.98 ea | These were for “floor joists”–support for decking.
|
| Pressure treated 2-in x 8-in x 12-ft | $18.57 ea | Main base structure. Two needed. |
| 1 in. x 6 in. x 6 ft. Premium Kiln-Dried Square Edge Whitewood Common Board | $6.74 ea | Fascia board on roof, front of aviary. |
| 1 in. x 4 in. x 4 ft. Common Board | $2.23 ea | Shelves and ramps. |
| 1 in. x 4 in. x 8 ft. Common Board | $2.63 ea | 1 in. x 4 in. x 8 ft. Common Board |
| Trex Enhance Basics 12-ft Clam Shell Grooved Composite Deck Board | $21.00 ea | Floor. |
| FASTENERS | ||
| #10 x 3” Stainless Steel Star Drive Flat-Head Wood Deck Screws | $18.97 ea | Floor. |
| 2-1/2” Black All Purpose Screws | $2.97 ea | Floor. |
| Grip-Rite Primeguard Plus #9 x 3” Polymer Deck Screws (1-lb Pack) | $9.48 ea | Floor. |
| Everbilt #10 3” Star Flat-Head Wood Screws (1 lb.-Pack) | $7.25 ea | Multiple uses |
| Woodtite 1” Fasteners (50-Count) | $5.48 ea | For attaching corrugated plastic roof to wood. |
| FastenMaster #0 x 2-7/8” Black Ecoat Flat-Head Interior/Exterior Structural Wood Screws (50-Count) | $19.48 ea | For attaching walls to floor, walls to walls, and walls to roof. |
| Post Latch | $14.91 ea | Door |
| 6” x 4.25” Black Heavy Duty Decorative Tee Hinge | $7.21 ea | Door |
| Gate Pull | $11.34 ea | Door |
| 4“ Galvanized Flat Corner Brace (2-Pack) (Used four for door.) | $5.21 ea | Door |
| Suntuf 24 in. Horizontal Plastic Closure Strips (6-Pack) | $5.98 ea | Roof |
| 26 in. x 6 ft. Misty Green Polycarbonate Roof Panel | $5.35 ea | Roof |
| 18 Gauge X 1/4” Crown 3/4” Galvanized Staples 2,500 Pieces | $8.99 ea | Mesh walls |
| Vinyl Lattice 4’ x 8’ | $30.75 ea | Decorative |
| 19 Gauge 1/2” Hardware Cloth | $4.80/sq ft | Mesh walls |
| TOOLS | ||
| 10” miter saw | To cut most of the main structural lumber | |
| Jigsaw
|
To cut thin pieces of wood like trim, shelving, fascia board | |
| 2-in-1 Stapler/Nailer
|
Stapler to attach mesh to wood; nailer to attach the trim strips over the ends of wire mesh | |
| 3 Gallon 1/3 HP 100 PSI Oil-Free Pancake Air Compressor
|
Needed if using air stapler…you can staple by hand, but very labor intensive | |
| Drill (corded preferable, as driving 3” screws uses a lot of power) | ||
| Wire snips
|
To cut the mesh | |
| Level | ||
| Hammer | ||
| Tape measure | ||
| Extension cord |
Costs
| Door hardware | $30 |
| Floor | $200 |
| Hardware | $150 |
| Mesh | $200 |
| Paint | $20 |
| Trim | $100 |
| Wood | $250 |
| TOTAL | $950 |
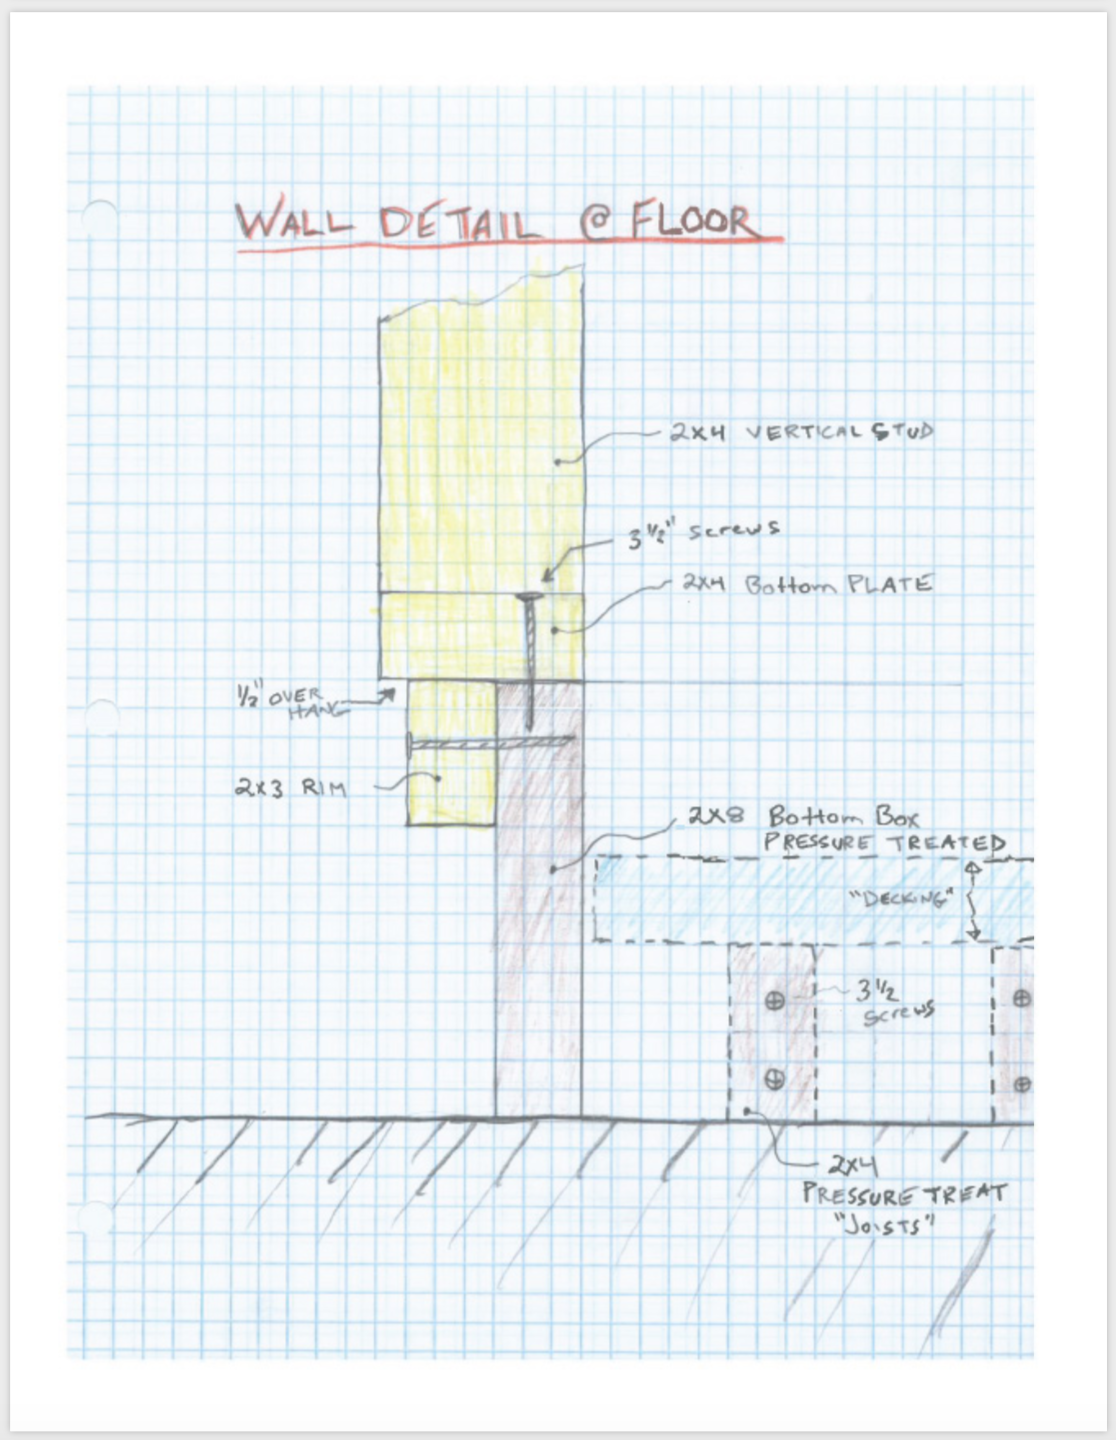
Jamie’s Diagrams