
An aviary is a walk-in sized, predator & rodent-proof enclosure for birds living outside.
How Do I Get an Aviary?
So many beautiful, unreleasable pigeons and doves need homes! Rescues like Palomacy develop homes for hundreds each year and, if the birds are to live outside, they need a big, predator and rodent-proof aviary. Getting one can be challenging.
Adopters can:
- Build their own: Great option if you have the basic building skills and tools required. See How to Create an Aviary.
- Hire a builder: Aviaries can be simple or fancy and if you have the budget, you can hire a builder. Make sure their design meets the required basics below.
- Buy something pre-made: Unfortunately most of the pre-made aviaries for sale are neither safe nor big enough and, those that are, are very expensive (with the exception of www.Wingzstore.com walk-in aviaries, details below.)
- DIY modify a big outdoor dog kennel to be predator & rodent-proof!
When building an aviary for pigeons or doves, these basics are essential:
- The aviary must be built sturdy to protect against predators & rodents (no matter where you live nor what deterrents you have).
- The entire enclosure- the bottom, sides & top – must be .5″ or .25″ hardware cloth* that is connected to ‘seal the envelope’ with no gaps more than .5″.
- Flooring, siding, roofing goes on OVER the mesh.
- Never use chicken wire (nor bird netting) as it is a death trap for the birds confined within it.
- Build it as big as you can.
- Half should be sheltered (with roofing & siding) & half open for light & air.
- Locate it in a sunny spot (shade is easy to create) where you can see & enjoy the birds.
- Make sure all doors & latches are raccoon-proof.
- Add a magnetic screen such as this one to the outside of the aviary door for an extra level of protection: https://a.co/d/02WrKBkp
- NOTE: PARROTS’ (ALL HOOKBILLS’) REQUIREMENTS ARE DIFFERENT FROM PIGEONS & DOVES (SOFTBILLS)!
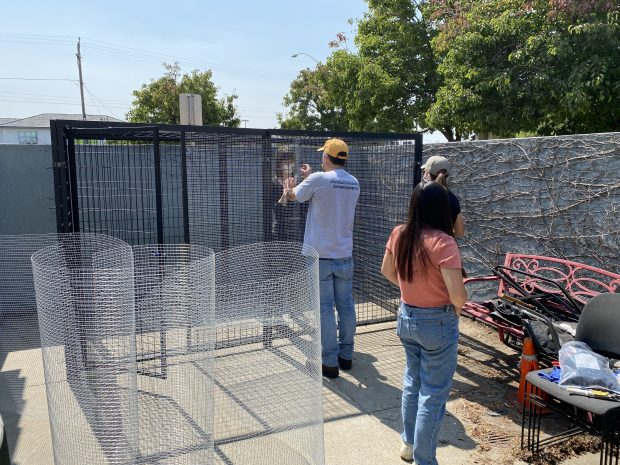
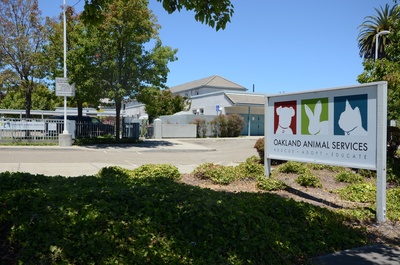
Here’s how to DIY make the easiest, most affordable safe pigeon or dove aviary by modifying a large outdoor dog kennel just like Palomacy and shelter volunteers did at the Oakland Animal Services.
Step 1: Get a Large Outdoor Dog Kennel (NOT SAFE UNTIL HARDWARE CLOTH ATTACHED!)
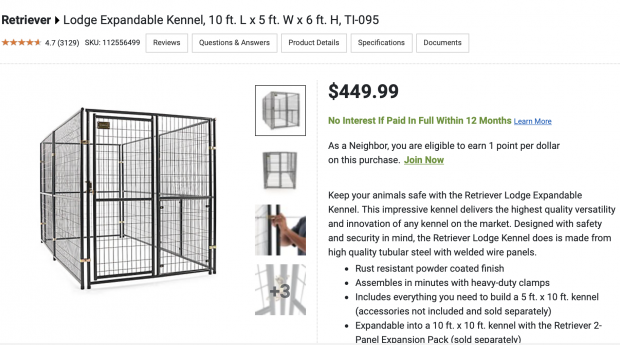
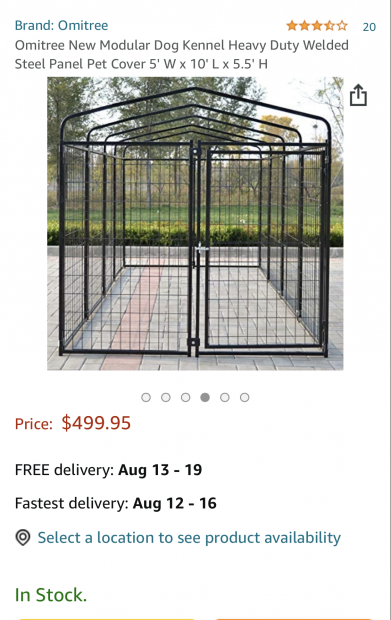
I love this one: welded wire (which is good looking & easy for attaching the hardware cloth), great size (10 x 5 x 6 is inexplicably better than 8 x 4 x 6), smallish door (safer) but get one with a top or you’ll need to make your own to support the hardware cloth & roof. See more examples below.
I really like a 10′ long by 5′ wide by 6′ high black welded wire* dog kennel. This is a great size for up to 14 pigeons or about 24 doves (never crowd your birds). Save money and the planet by shopping for a used one (they’re sturdy and easy to clean). Get one with a wire roof (if available) and choose a small-door model like the one above (the bigger the door, the greater the risk of fly out). I highly recommend the 5′ wide (rather than a 4′) because that extra foot of width makes a really big difference for birds and people both. If you’ve got the space and budget, the 10′ by 10′ size is even better! (*There are also dog kennels made of chain link that can be used. It’s a little more challenging to attach the hardware cloth but they are less expensive.) Definitely shop around for the best price and buy used if possible.
Step 2: Get Enough Hardware Cloth to Cover ALL Sides, Top & Bottom
Buy enough hardware cloth (not chicken wire) with mesh openings of either .5″ or .25″ to cover every inch of the kennel with enough to overlap at seams and around edges. It’s sold in big box stores, hardware stores, feed stores and my favorite for selection and price – at builders’ supply stores like Howard Wire Cloth Company (Google “wire cloth” to find one near you). We used about 160 feet (most of two 100′ rolls) of 48″ wide hardware cloth to cover this 10 x 5 x 6 kennel. Prices vary but a 100′ roll of 48″ wide .5″ 19 gauge hardware cloth costs around $200.

Here’s what half inch & quarter inch hardware cloth look like
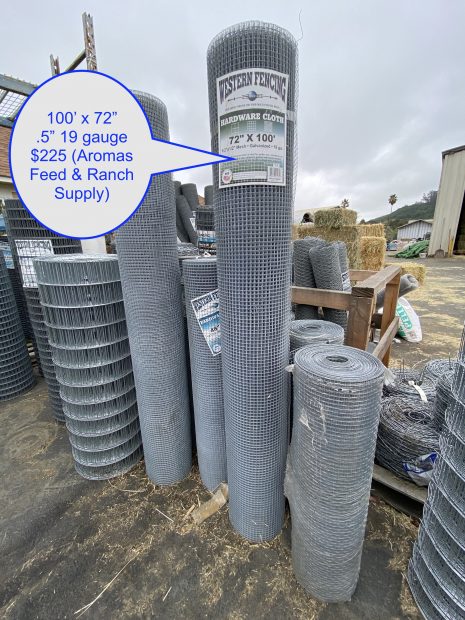
Great deal! 100’ x 72” roll of 19 g .5″ hardware cloth sold at Aromas Feed & Ranch Supply. (Get the widest roll you can to reduce the number of panels you’ll need to cut.)
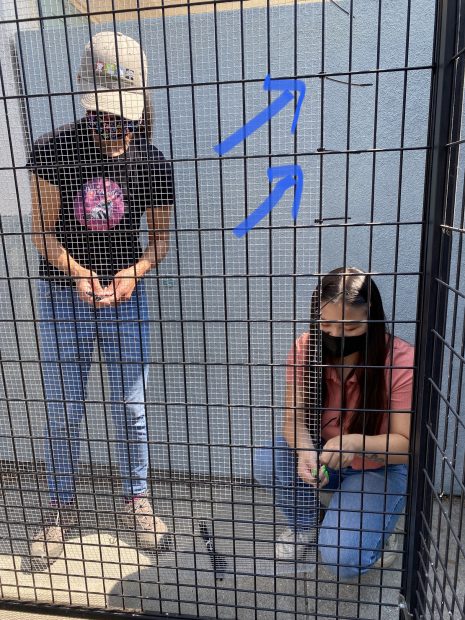
Step 3: Measure, Cut and Attach Hardware Cloth with Zip Ties
Volunteers first cut sections off the 100′ roll of hardware cloth to fit the kennel. Here we used 6′ lengths of the 48″ wide for all the sides. We overlapped a little so that there would be no gaps We cut a smaller piece to precisely fit the door and extend around the gaps.
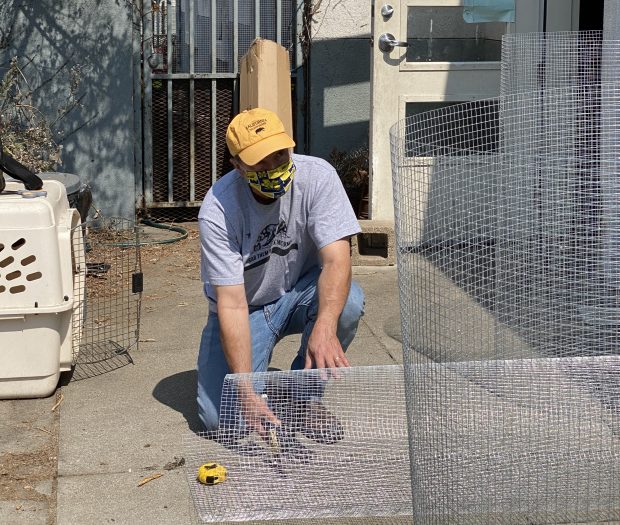
The hardware cloth is easily cut with tin snips, pruning shears, wire cutters, etc.
We cut 6′ pieces of the 48″ wide mesh for the sides. Here, volunteers start zip tying the pre-cut-to-fit sheets of .5″ 19 gauge hardware cloth to the outside of the 10 x 5 x 6 kennel.
Use zip ties approximately every 6″ to snugly attach the cloth to the frame along both edges & down the middle too.
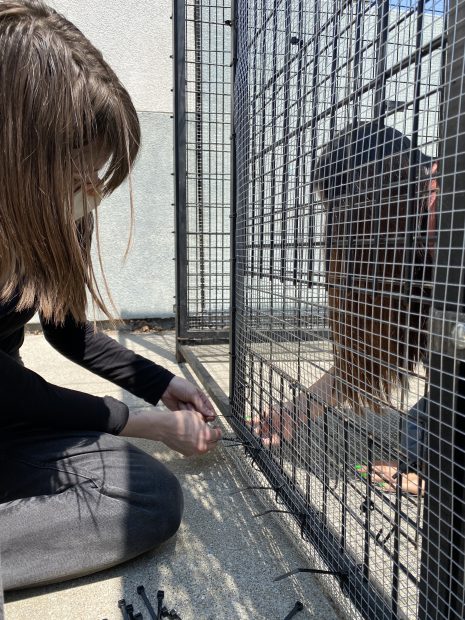
The zip ties secure the hardware cloth panels to each other & to the sturdy frame of the kennel. Getting the zip ties through, turned around & secured goes a LOT faster with two people!
It’s easy & fun to convert a kennel into a safe, comfortable home for rescued pigeons or doves, especially with a couple of friends to help.
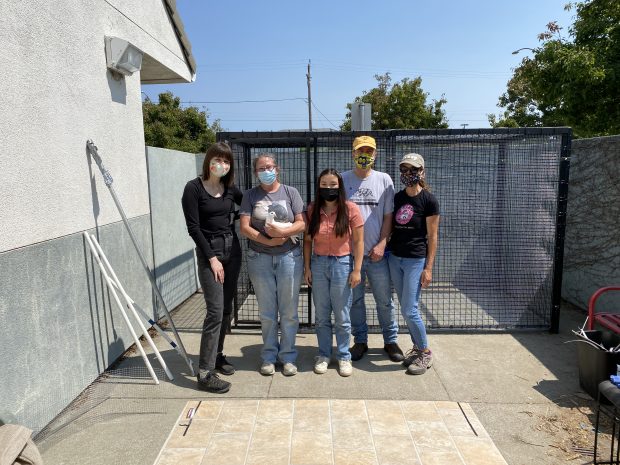
Here we are about halfway done. We took a short lunch break, met & snuggled a new pigeon, took a team photo & got back to work. (Note vinyl remnant for floor in the foreground).
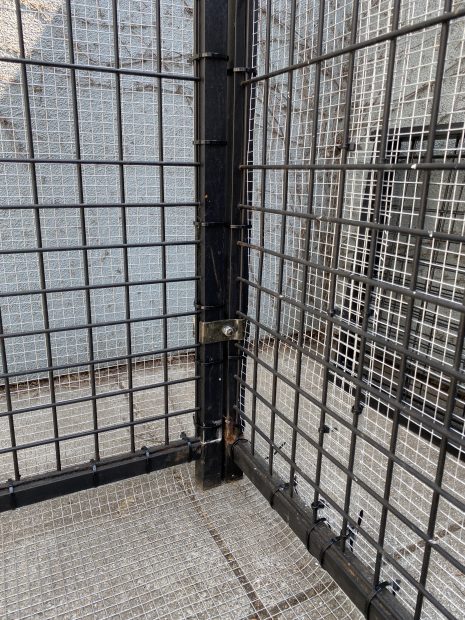
This close-up shows how the hardware cloth covering the bottom extends up & is secured to the frame & hardware cloth on the sides. No gaps! It is much easier to “seal the envelope” correctly in the beginning than to chase down & patch gaps after the fact.
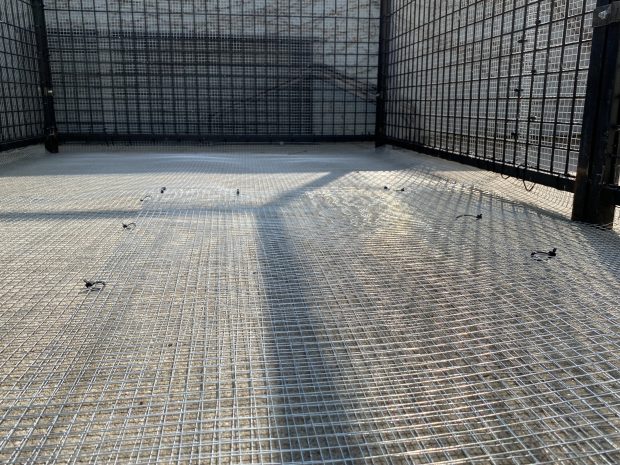
The entire bottom must be enclosed by carefully secured hardware cloth. Doesn’t matter what’s below- cement, rocks, patio, etc. nor what will go over – vinyl, pavers, plywood, Trex, etc. This no-gaps design is what makes an aviary predator & rodent-proof. Otherwise, it’s just a foraging toy for predators.
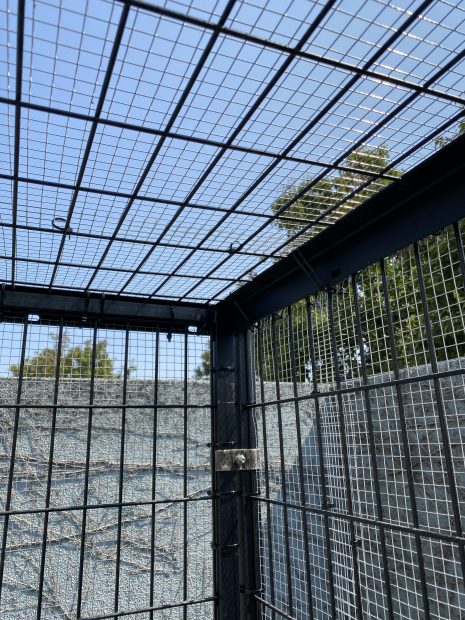
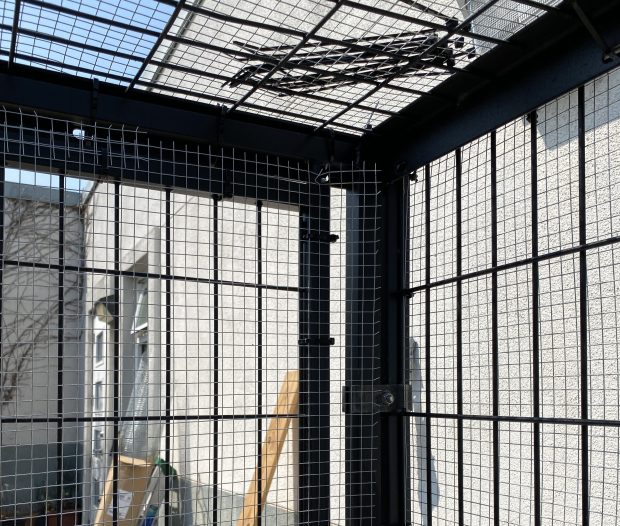
Here’s an upper corner showing the same no-gaps coverage of sides to ceiling. The sturdy kennel provides the structural strength that enables the hardware cloth to exclude predators & rodents. (Note- the .25″ is even better at keeping mice & talon-tips out.)
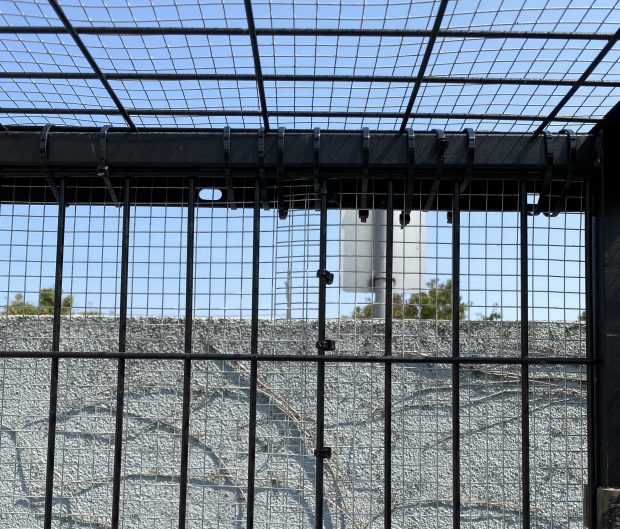
In the center, you can see the 1.5″ overlap we used where the hardware cloth panels meet & how liberal we were with the zip ties. Building the aviary tight from the start discourages predators. (If they find weak spots, gaps or places they can wiggle, predators will keep working at it.)
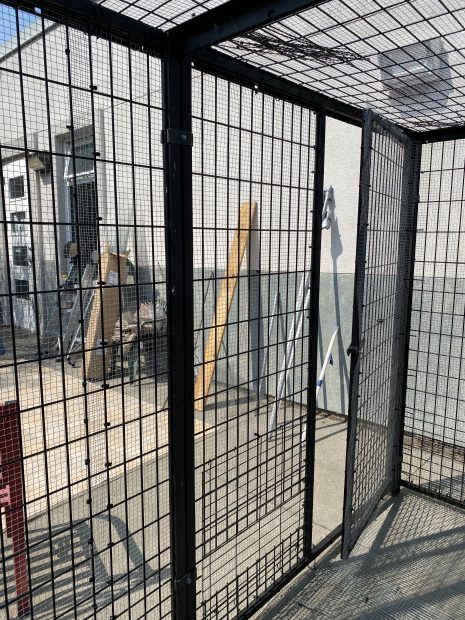
The door is always the most dangerous element for an aviary. (Pigeons & doves don’t really need a double-door feature like fast-zipping songbirds, finches, budgies, but they do need a secure single door!) Important door features: small is good, opening inwards is best, all gaps around the opening & hinges must be covered & latch must be raccoon-proof.
Take your time figuring out how to secure the gaps around the door while still allowing for it to open & close smoothly. We chose to orient this door to open inwards & so attached the gap-covering-sized piece of hardware cloth on the inside.

Here’s the zoomed in view to show the hardware cloth cut & attached so as to overlap the gap while still allowing the door to move.

This view shows the other side of the door & how the cut to gap-cover sized hardware cloth extends over this gap as well. This is also a good view of how the floor mesh was cut & installed wide enough to bend up & over the bottom gap & attach to the kennel frame & side mesh.
We love vinyl remnants for aviary floors. It is pigeon-feet friendly, easy to clean & inexpensive. Buy a single piece big enough to cover the floor without seams. This piece is 11′ long by 6′ wide & we trimmed to fit the 10′ x 5′ aviary. (Other recommended options: cement pavers, marine grade plywood or Trex. Palomacy advises against gravel, sand, or shavings.)
Step 4: Furnish
Pigeons (or doves) need thick tree branches for perches (no dowels), shelves (to maximize the horizontal surface area), multiple big, tubs of water (for drinking and bathing), multiple dishes (ceramic, flat-bottomed) or feeders for food, nest boxes or baskets, a nice big mirror for showing off in and they need half of the aviary to be roofed and sided to provide shade, shelter from the weather, privacy and security. Raccoon-proof the door latch with a lock or carabiner. Don’t clutter the aviary. The more you put in, the more risks you introduce, the more poopy things you’ll need to clean and the less flying and flapping space for the birds.
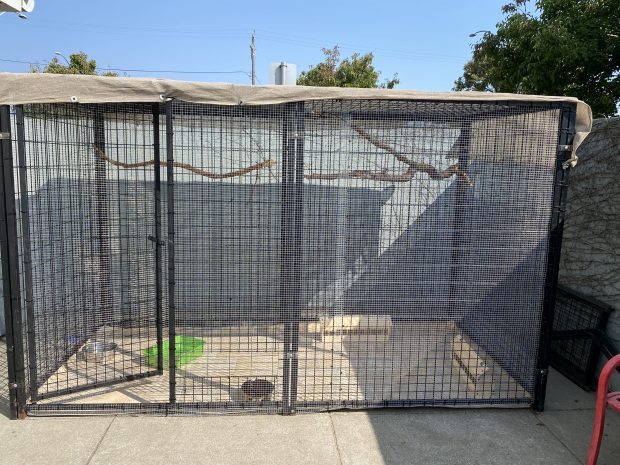
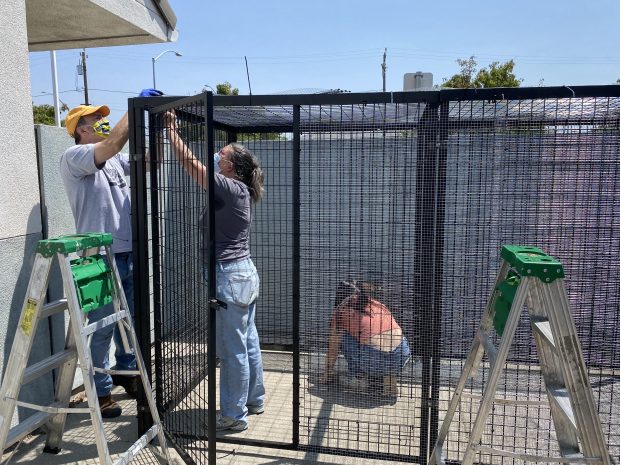
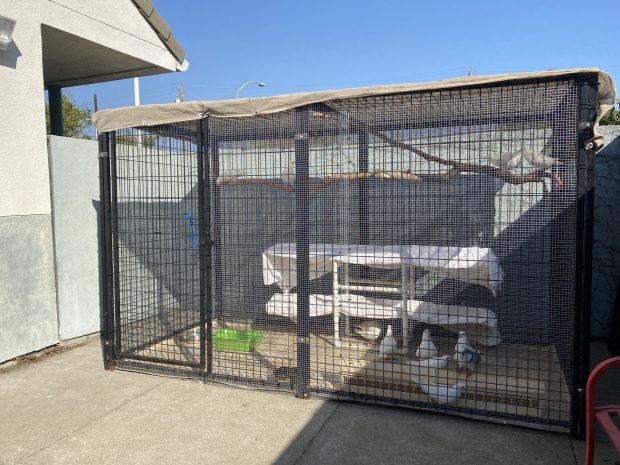
Almost ready for the birds- all mesh is secured, a temporary shade cover added until a waterproof half roof of corrugated roofing panels is added, & perches, feeders & water dishes in place.
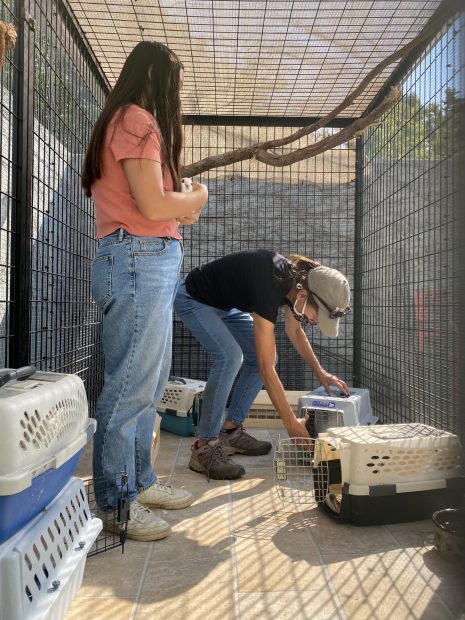
Bringing Oakland Animal Services’ rescued & adoptable pigeons in to their wonderful new enclosure…
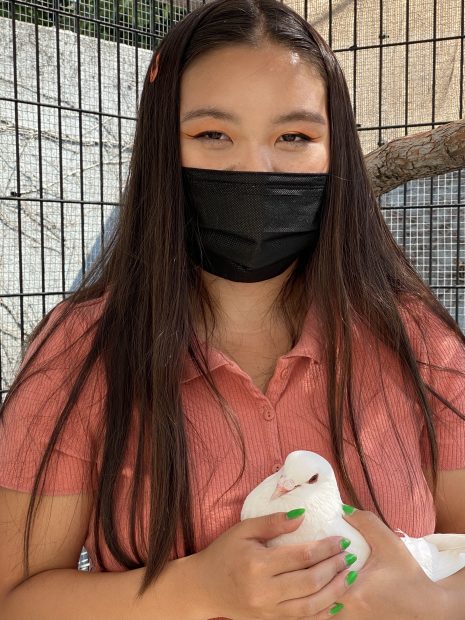
Never underestimate your power to make the world better. When Claire was 12, she met rescued pigeons at Animal Camp & they touched her heart. She convinced her family to build an aviary in their yard & they have been fostering, rescuing & volunteering to help pigeons ever since. Together, in partnership with Palomacy & Oakland Animal Services, Claire & her family have helped hundreds of pigeons.
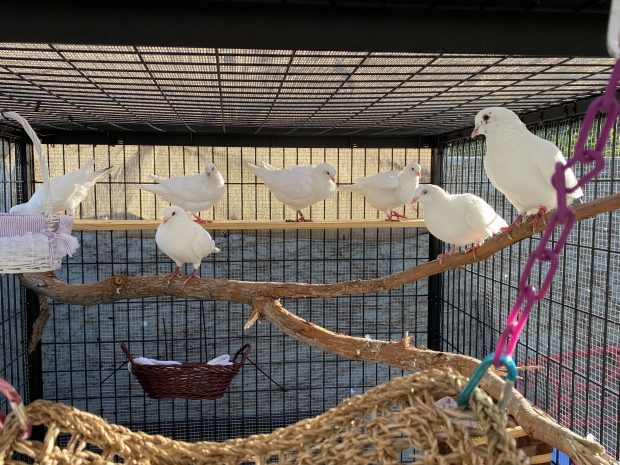
Wow! This is for us?! Oakland Animal Services’ rescued pigeons move into their new aviary!
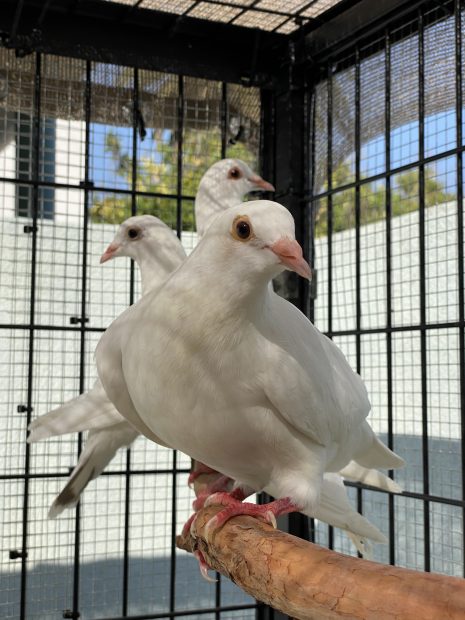
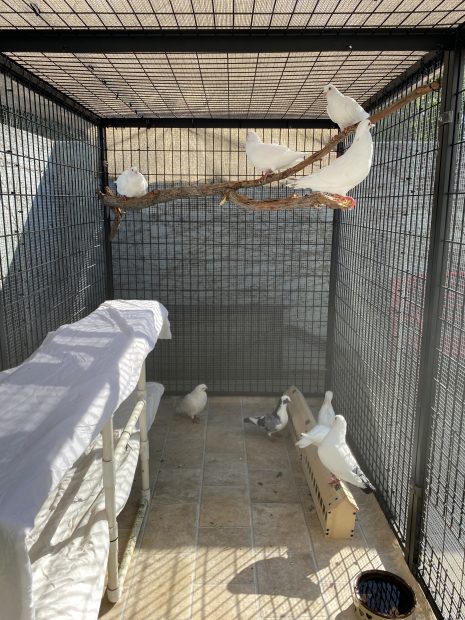
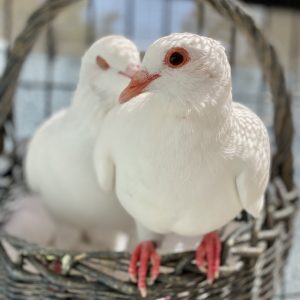
These smart, beautiful, easy going King pigeons make wonderful companions outside in a predator & rodent-proof aviary like this one or indoors with the family. These domestic pigeons were lucky to be rescued alive when they were inhumanely “released”.
Their first night- not yet fully furnished but very comfy even so!
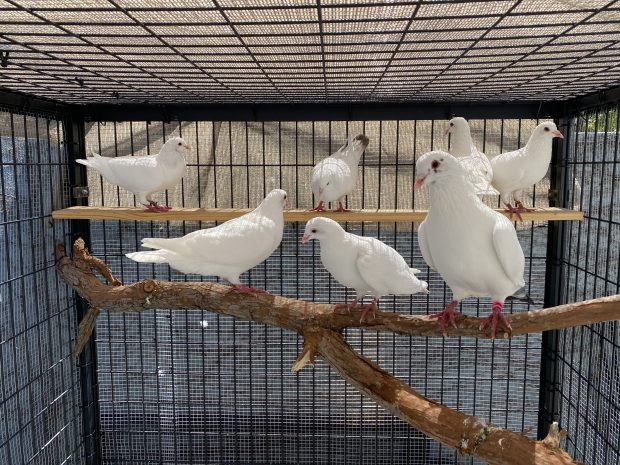
The next day, Kay installed shelves & nest baskets. Pigeons LOVE shelves & nest baskets!
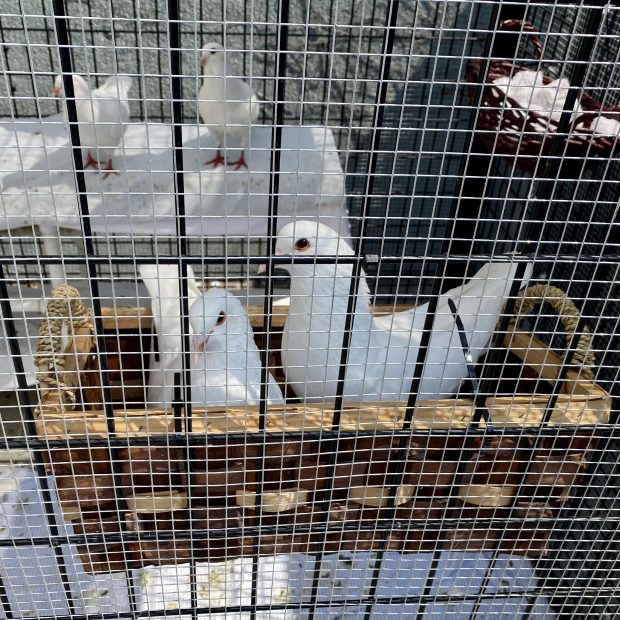
Palomacy recommends upcycling some nice big baskets from the thrift store for nests!
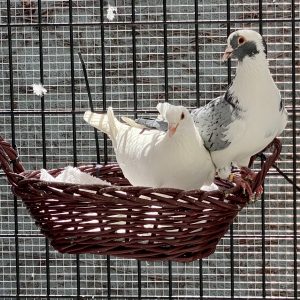
Our nest is best
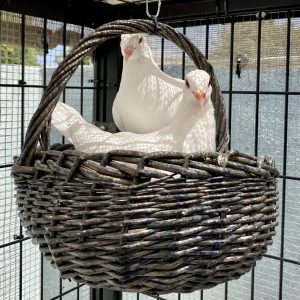
Just hangin’ around…
THANK YOU FOR HELPING US
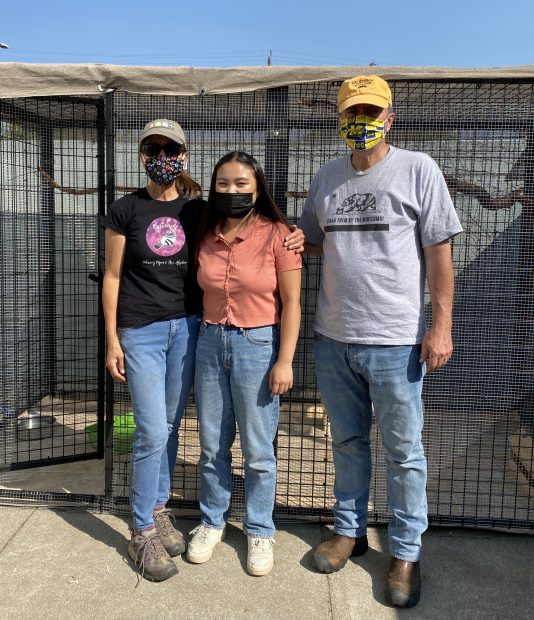
Extra thanks to Claire, her dad Ken & especially her mom Kay for helping SO many birds in so many ways!
Palomacy is deeply grateful to Oakland Animal Services for all they do to serve & adopt out rescued pigeons. THANK YOU!

Adopt pigeons from Oakland Animal Services!
More Kennels- Dos & Don’ts!
DO
I really like this one too. It includes the top braces you’ll need for attaching the hardware cloth & the half roof (corrugated roofing panels, plywood, etc.) but the door is bigger than I like. (Good size for up to 14 pigeons or 24 doves.)
DO
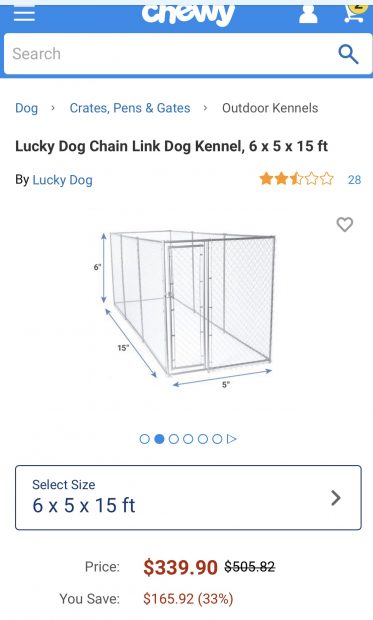
This is a great price (includes free shipping) & a big kennel – 15 x 5 x 6! Needs crossbars added over the top to provide support for the hardware cloth & half roof. (Good size for up to 20 pigeons or 30 doves.)
DO
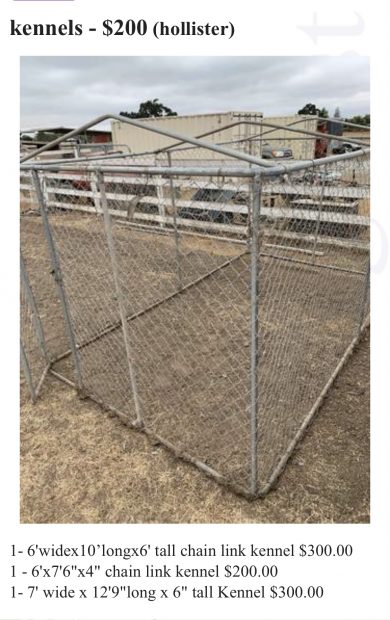
Chain link is less expensive & just as safe when hardware cloth is attached. (NOT SAFE WITHOUT HARDWARE CLOTH!)
DO
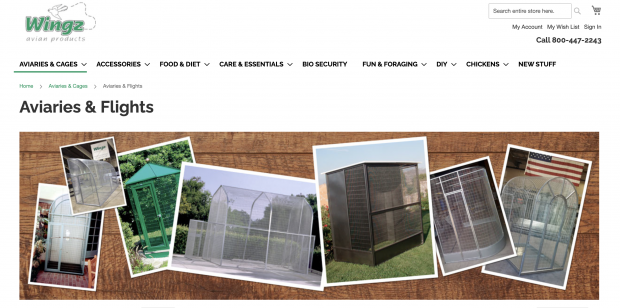
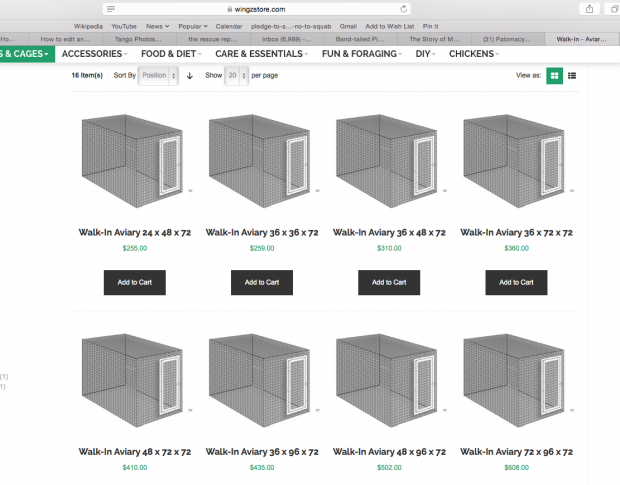
www.Wingzstore.com walk-in aviaries
_________________________________________________
DON’T!
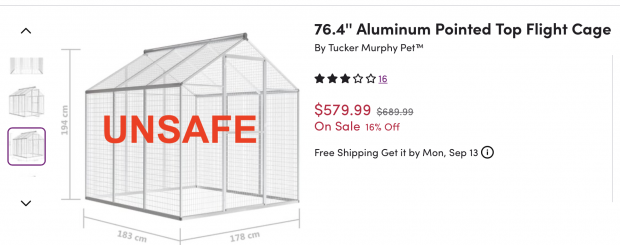
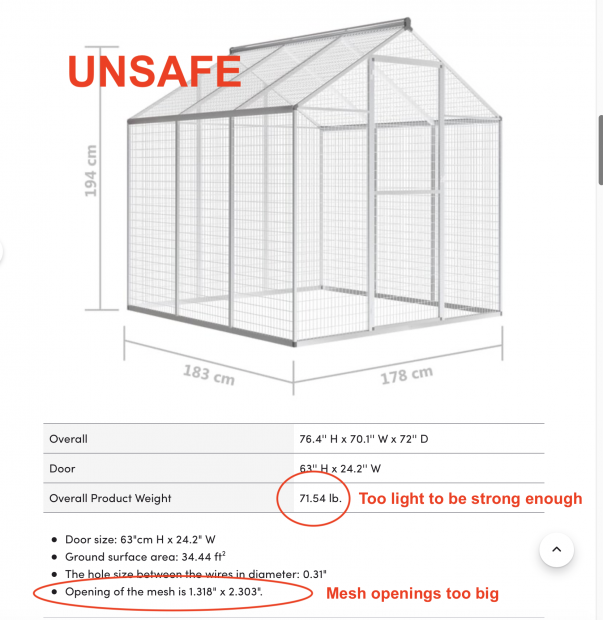
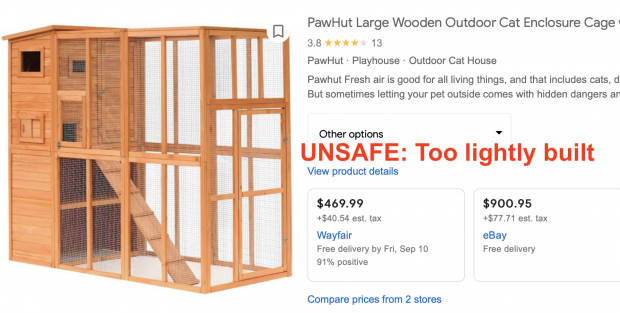
DO NOT BUY: NOT PREDATOR & RODENT PROOF. UNSAFE!
DO NOT BUY: NOT PREDATOR & RODENT PROOF. UNSAFE!
DON’T!
CATIO NOT SAFE FOR BIRDS, DO NOT BUY!
Need help? Not sure if the enclosure you’re considering is appropriate? We can assist! Please join & post in our Palomacy Help Group for fast, trustworthy support.
*.25″ hardware cloth is preferred, since it will keep out mice as well as predators.
Helpful Links
What to Do (& Not Do) if You Find a Pigeon or Dove
How to Care for a Rescued Pigeon or Dove
Important Info About Pigeons & Leg Bands
Find Pigeon & Dove Friendly Rescues in the US
What’s the Difference Between Pigeons & Doves?
Elizabeth Young is the accidental pigeon rescuer who in 2007 founded Palomacy Pigeon & Dove Adoptions
